Introduction
I recently bought myself a Fuji X100T mirrorless camera. This camera has a hybrid viewfinder consisting of an electronic (EVF), an optical (OVF) and a combined viewfinder. When shooting with it for the first time, I really liked the OVF, because it shows more than what will actually be in the photo afterward. In street photography, this is one of the major arguments for rangefinder cameras, because you can see objects entering the frame very early. While shooting I realized some weird things happening in the OVF, which raised many questions. I decided to write this article and summarize the lessons I had learned about the parallax phenomenon.
Rangefinder cameras

With modern (D)SLR or mirrorless cameras, you will see exactly what the camera sees when you look through the viewfinder. For DSLRs, this is due to the fact that the viewfinder is optically connected to the lens by using a mirror and a pentaprism. Mirrorless cameras capture the light coming from the lens directly with the sensor and bring continuous images to EVFs on the fly. In both cases, focusing, viewing and taking photos is all done through the same lens. With rangefinder cameras, however, viewing and shooting are optically separated from one another.
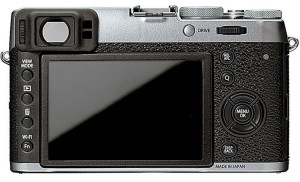
In addition to the actual lens, you’ll find an optical viewfinder at the top left corner (see above). This style of camera, the rangefinder camera, goes back to the 1920s and is mostly found in Leica cameras today. Leica is very popular and well-known for their rangefinder bodies. Lots of street photographers like this kind of viewfinder, because the camera becomes an extension of your vision. You can observe people entering your frame with one eye while the other one observes the environment.
The parallax phenomenon
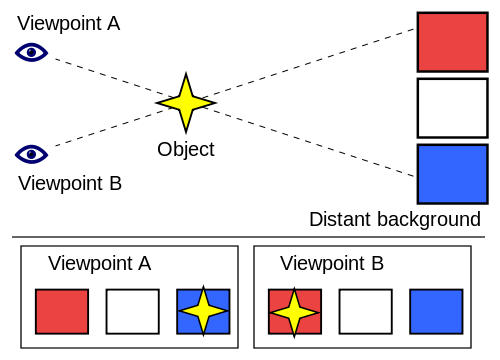
Take a look at the following scene of a single object as seen from two different viewpoints A and B:
In the example above, the object will appear in front of the blue background when observed from viewpoint A. It will appear in front of the red background when observed from viewpoint B. This effect of displacement is referred to as parallax. Applied to the rangefinder style camera above, viewpoint A could be the lens and viewpoint B could be the optical viewfinder. Thus, it becomes obvious that objects as seen through the rangefinder may appear differently than they do through the lens.
This parallax error is negligible for large distances close to infinity, because then the lines are nearly parallel. However, the error increases the closer you get to the camera. You can observe the effect especially when shooting close-ups like portraits or macro shots. The good news is that modern rangefinder cameras are able to compensate that error by adapting frame lines within the OVF when changing the focus distance. I will address how the Fuji X100T compensates the parallax error in the next sections.
Compensating the parallax phenomenon
As stated earlier, modern rangefinder cameras can compensate the parallax, even in the OVFs. Depending on the focusing distance (either AF or MF), the frames shown in the viewfinder will appear differently, so you will get an idea what the photo will look like. The closer the focussing distance, the more the camera has to compensate and the more distortions can be seen. On the other hand, the closer the focus is to infinity, the more natural and untouched the frame will look like.

The camera changes the frame lines on the fly. So you can actually see them moving, while changing the focus in MF from infinity slowly to a very close distance like 0.5m, for instance. You can play around with the focus distance in order to get a feeling of how the camera compensates and changes your frame lines. Note that the grid lines (if turned on) also change their position in a nonlinear manner. The rule of thirds grid, for example, won’t be divided into three sections of the same size. Rather, they will appear a little weird. In the examples above (left to right), the focus distance changed from inf. over 0.5m all the way down to 0.1m. As you can see, the frame lines changed drastically. The near the focus, the more the frame turned to the lower right corner.
Focusing in the parallax world
As the OVF also shows autofocus (AF) points, the parallax phenomenon explained above applies to these points, too. Depending on the focus distance, they appear in different locations. The Fuji X100T, which I will use as an example here, has a dedicated feature called corrected AF for that. The following simplified figure depicts the basic layout of what you will see, when looking through the OVF of a Fuji X100T:
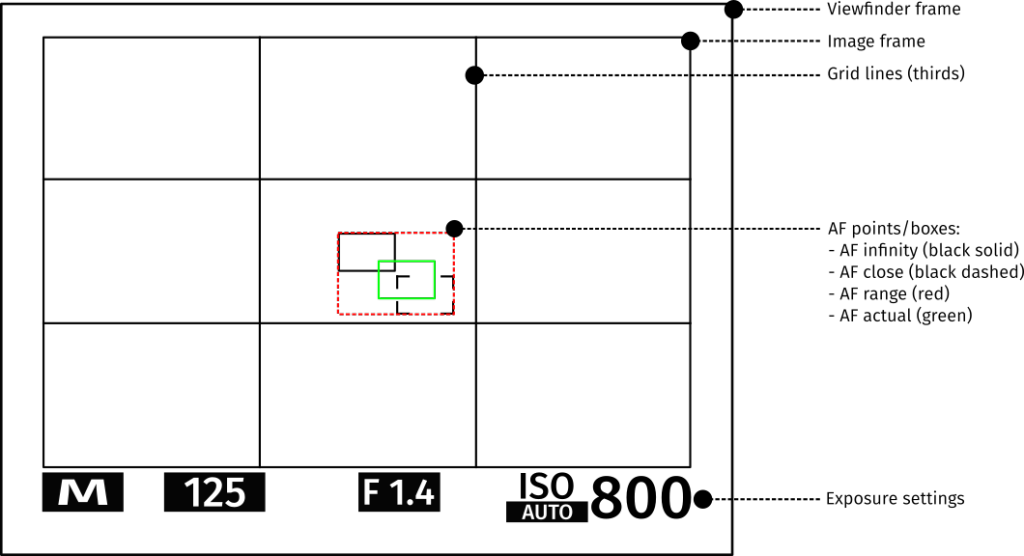
The outer viewfinder frame contains everything you can see when looking through the OVF. The image frame contains everything that will be visible on a taken photo. The grid lines serve as a guide for better compositions. The exposure settings show mode, shutter speed, ISO, aperture and other things. If the corrected AF features is turned on, two AF boxes will be shown initially: a box for close focus (black dashed line) and a box for infinity focus (black solid line).
As you can see, the box for infinity focus is nearly placed in the middle, because the parallax effect has the least impact when the focus distance is infinity, as stated above. However, the box for close focus has a slightly large offset, because the different viewpoints of the lens and the viewfinder have a huge impact, if the focus distance is very close. Thus, the actual AF box (green) will be somewhere on the diagonal between the close and the infinity box. Both of these boxes kind of span the focus range box (red), which is only virtual and not visible.
Example
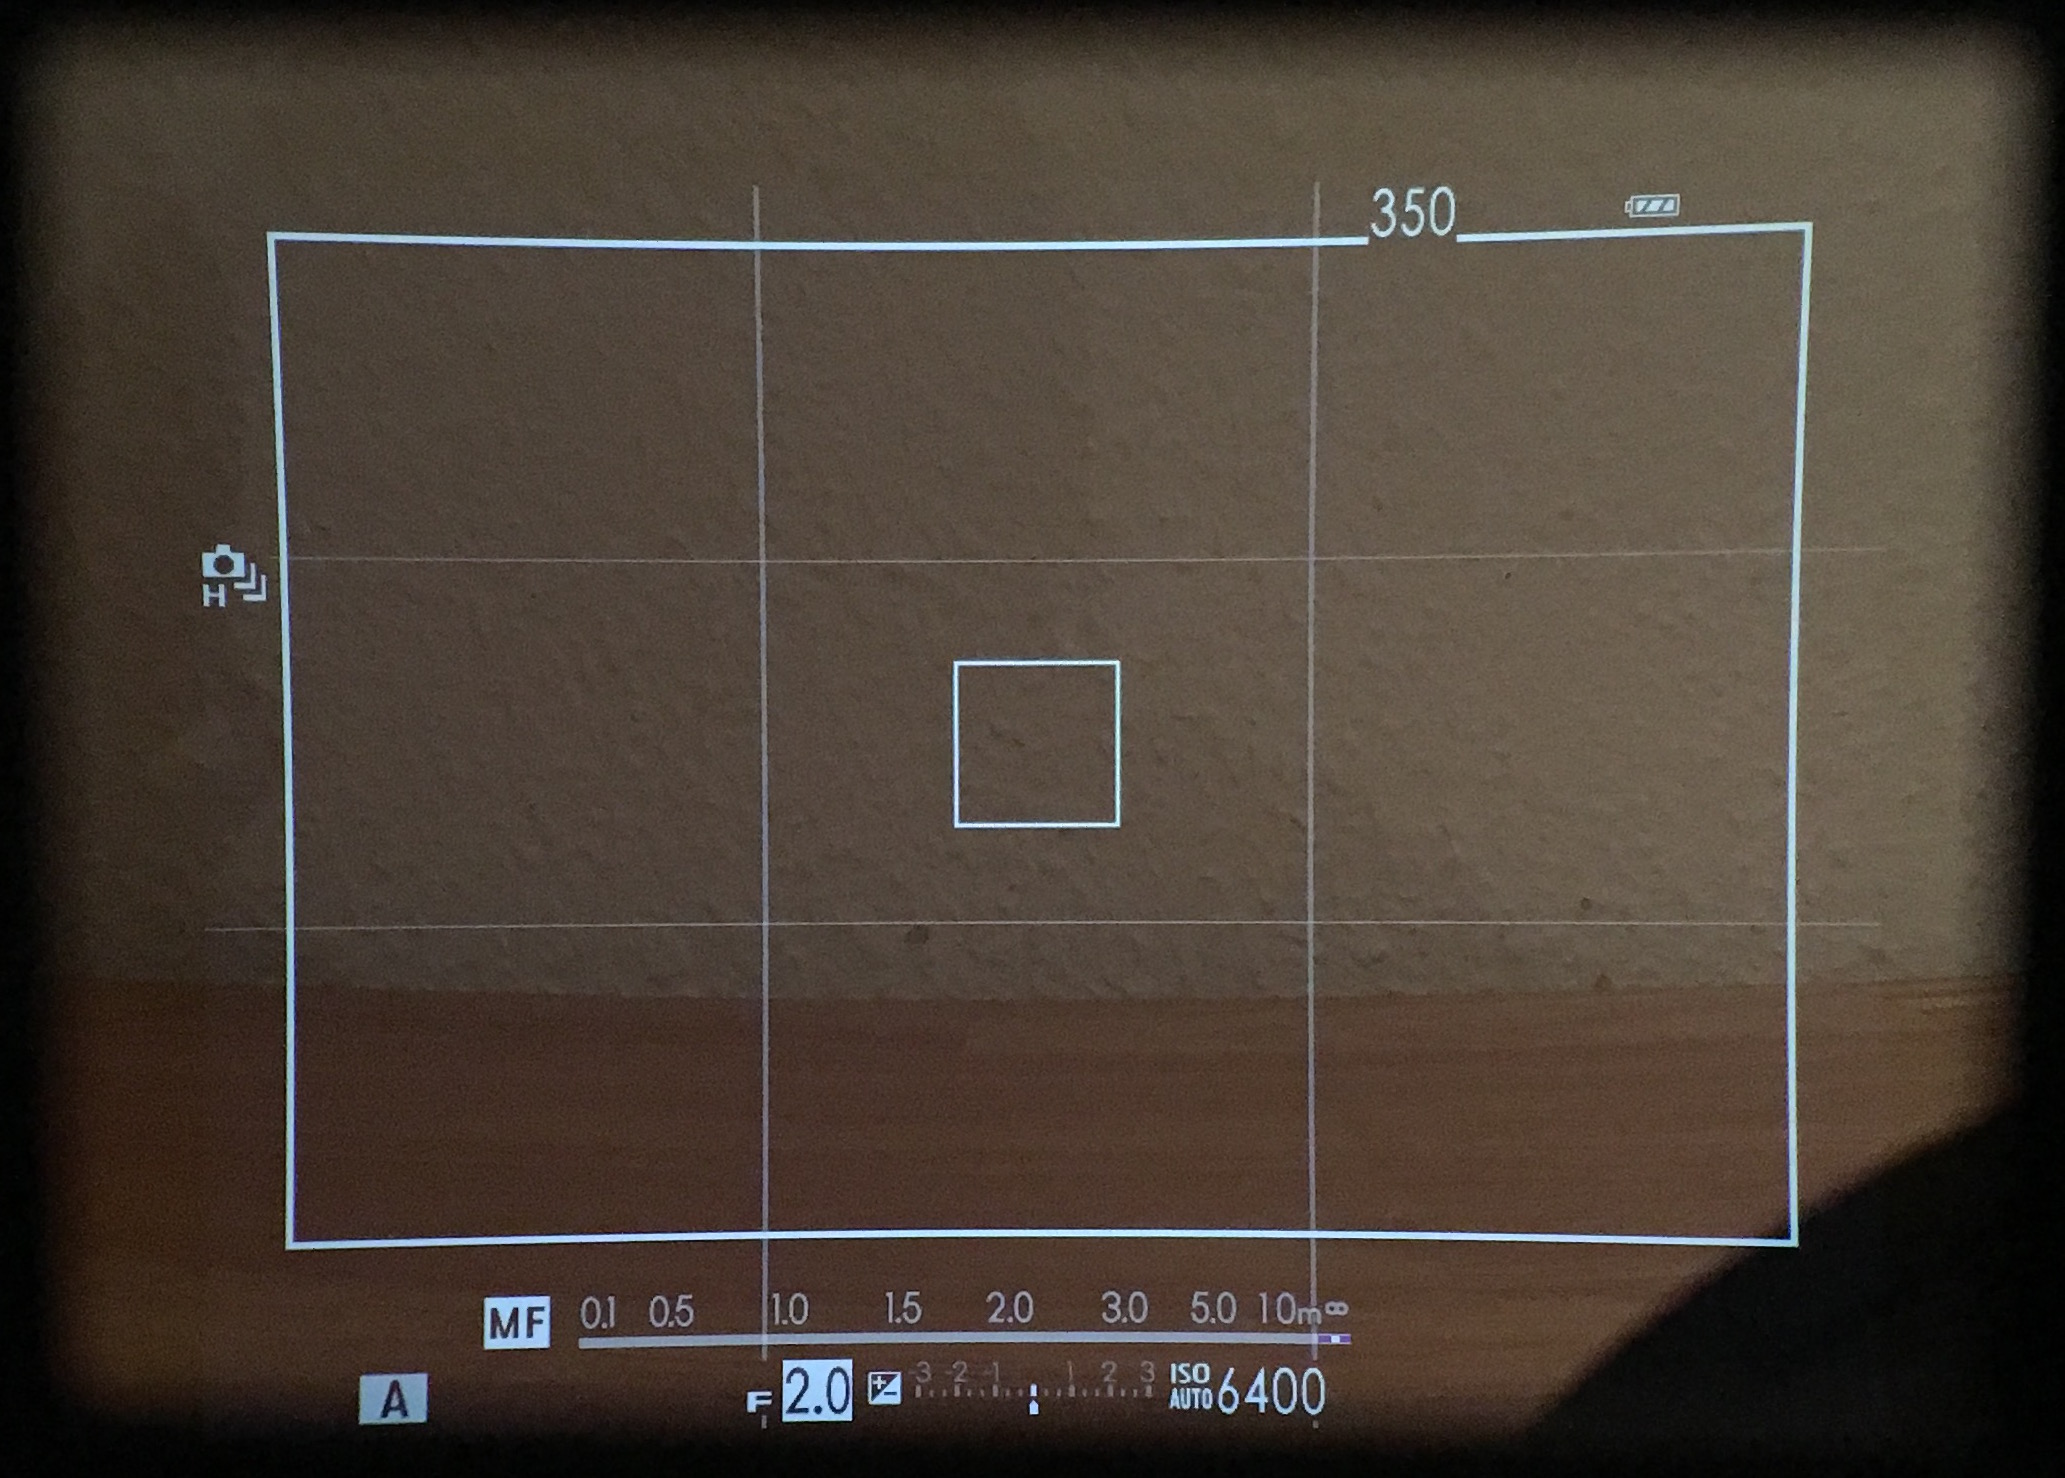
Consider the following example:
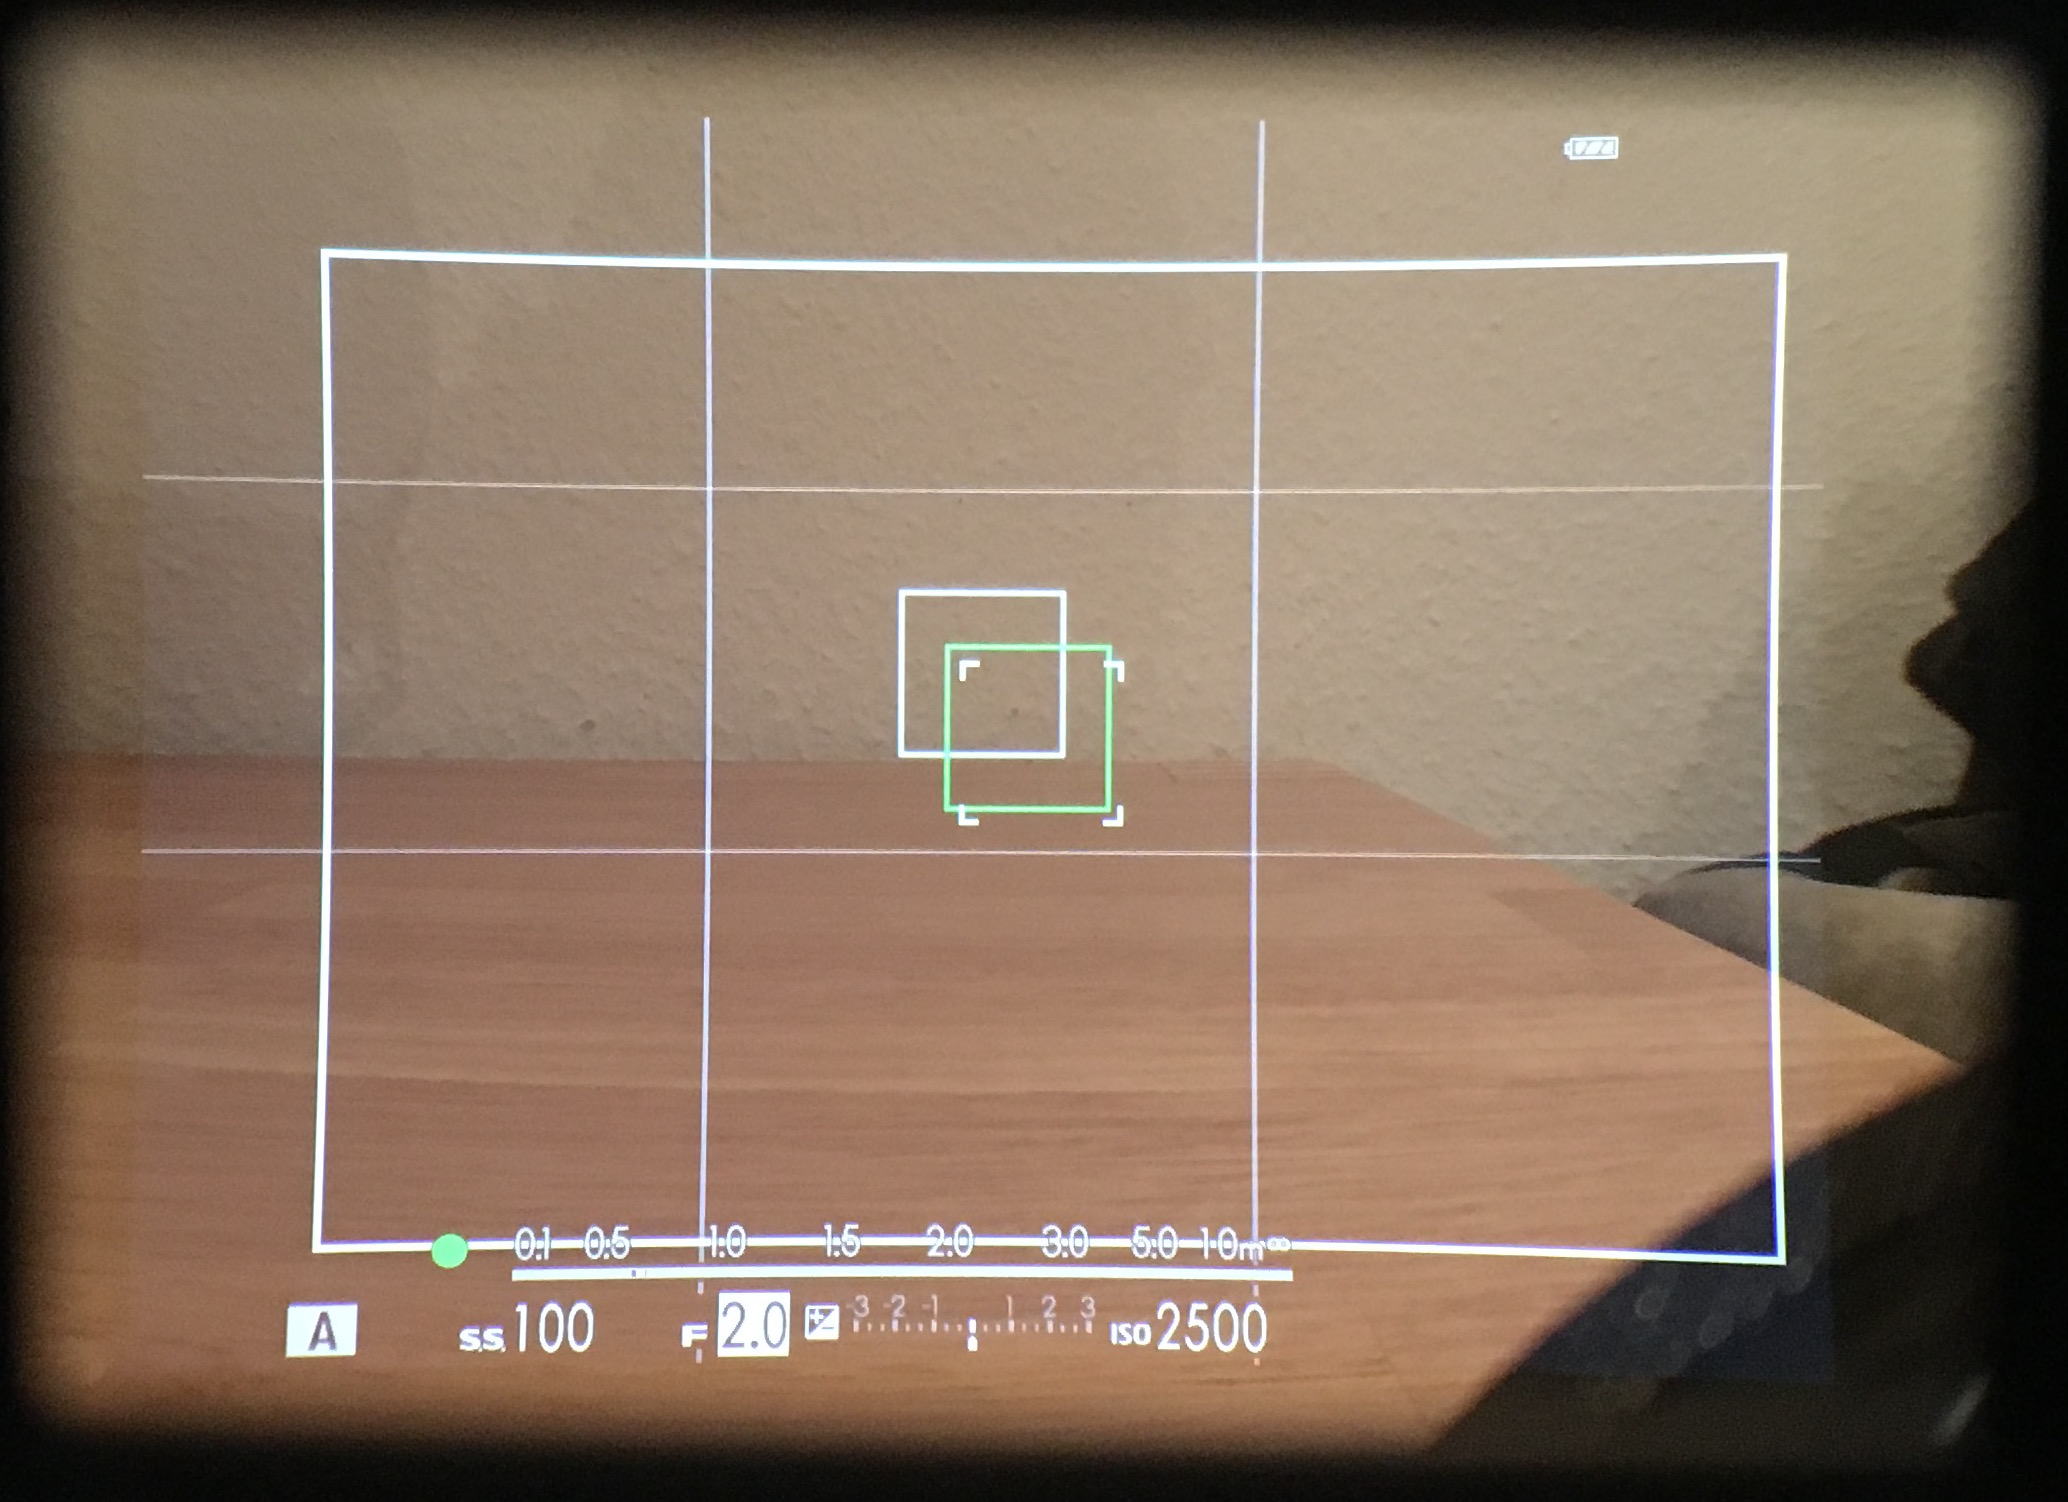
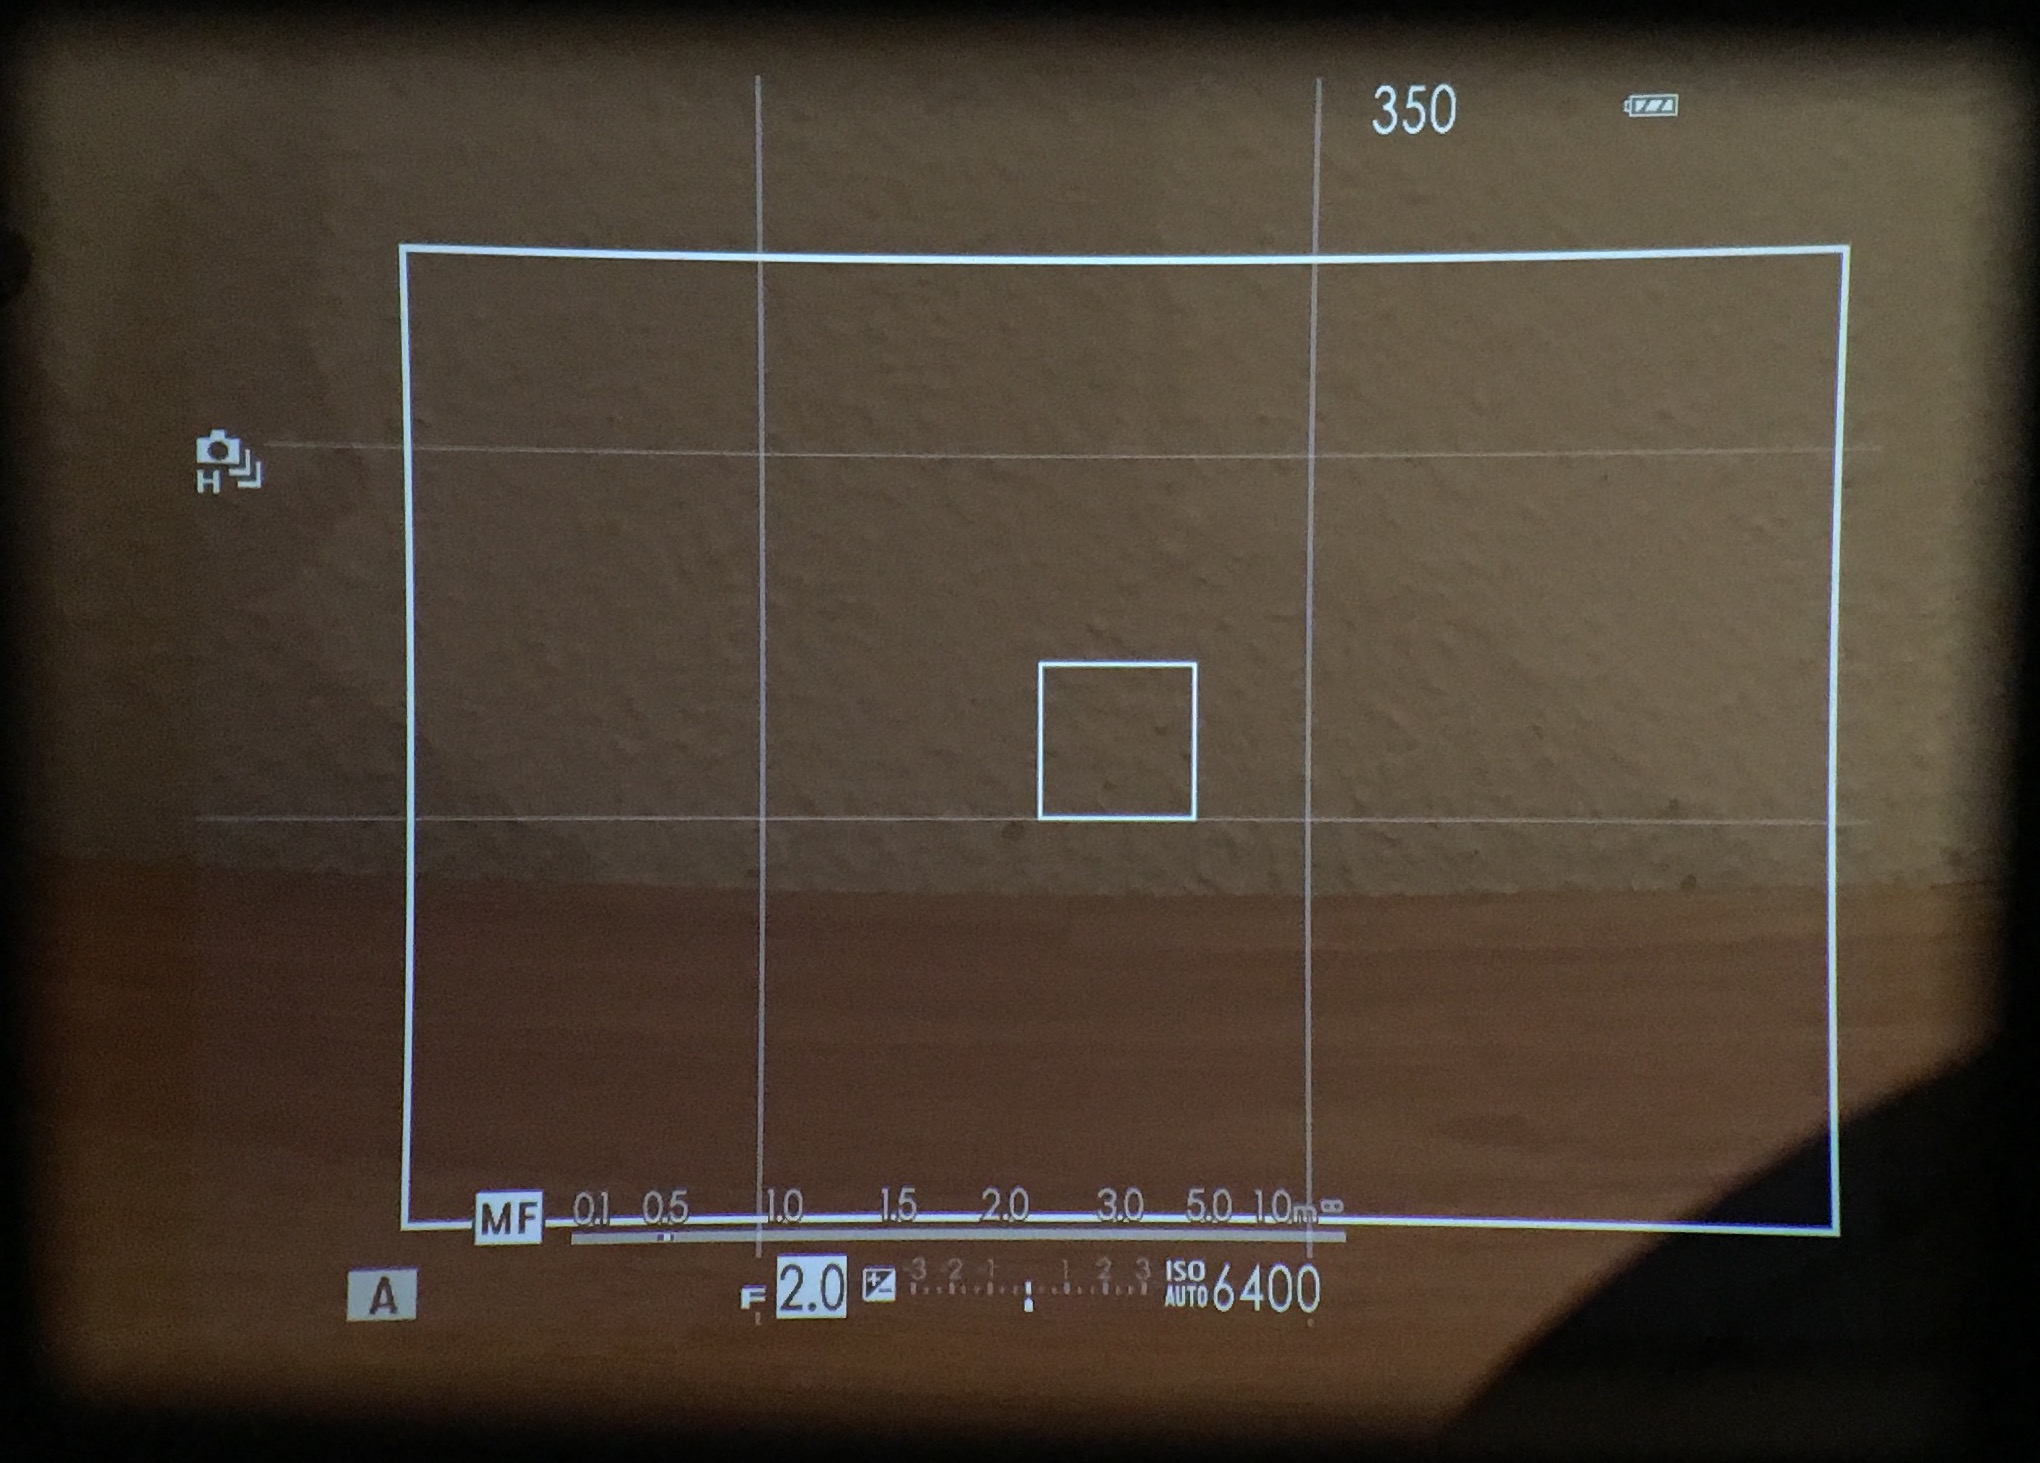
In the first image, you can see the basic still OVF with the corrected AF feature turned on. As mentioned earlier, the OVF shows an AF point for the infinity focus distance (solid lines) and one for the closest focus distance (dashed lines). As soon as the shutter button is pressed half way (second image), the camera’s AF computes the distance to the object (which is in itself a completely different and complex topic) and then adapts the frame lines accordingly. Additionally, a new green AF point appears, which represents the actual AF position. Since the object focused is close to the camera, the green box appears closer to the dashed AF point than it does to the inf AF box.