Introduction
 We all know them, those unique flash street photos of weird looking people taken by Bruce Gilden. When I first saw Bruce in a documentary, he seemed like the god of street photography to me. The way he approaches people on the streets is special. Using flash in street photography can give you some really funny, unexpected and also terrifying results, depending on the settings and on how you hold the flash. In this article, I will try to sum up which equipment you will need and how to set it up properly in order to get some nice results. All the information you can find here come from my experience with my Fuji X100T. However, I will try to be as abstract as I can. If you have any question, send me an e-mail.
How Flash Generally Works
I don’t want to go into all the details here, but I think there are some terms worth noting.
1) Power
The power of a flash is mostly expressed by its guide number, which basically depends on the f-stop and the distance. So a flash with a higher guide number can go further (given the same f-stop). The most important thing to know about flash is that light travels according to the inverse square law, meaning that if you double the distance, you will only have one quarter of the amount of light!
2) Coupling
A flash can be used either on-camera (directly mounted to the hot shoe) or off-camera (wirelessly or with cables). We basically distinguish manual and TTL flashes. With a manual flash, you will have to set the power the flash operates on yourself. The power will be set in fractions 1/1, 1/2, 1/4, …, 1/64. On the other hand, a TTL flash determines the power together with the light meter of the camera, so you don’t have to think about it. In this case, the camera “talks” to the flash and tells it which power to use. The camera can then include the amount of light coming from the flash in its computation of the exposure settings. It should be obvious that a TTL flash is way more convenient than a manual one. However, TTL flashes tend to be more expensive, especially when used off-camera, which is more preferable in street photography.
3) Sync Speed
A flash needs to be synchronized with the shutter of the camera, which is why we cannot use any available shutter speed. The flash will fire until a certain (short) shutter speed has been reached. This is referred to as the sync speed. If you go faster than that, the flash will not fire any more. However, modern cams and flashes are able to use HSS.
For long shutter speeds, the flash will not light up for the complete exposure period, so we distinguish first – vs. second curtain flashing. As the names suggest, the first will light up with the first curtain and the latter will light up with the second curtain of the shutter, leading to different results, especially concerning light trails.
The Equipment You’ll Need
1) A camera
Well, that one should be obvious.
2) A flash
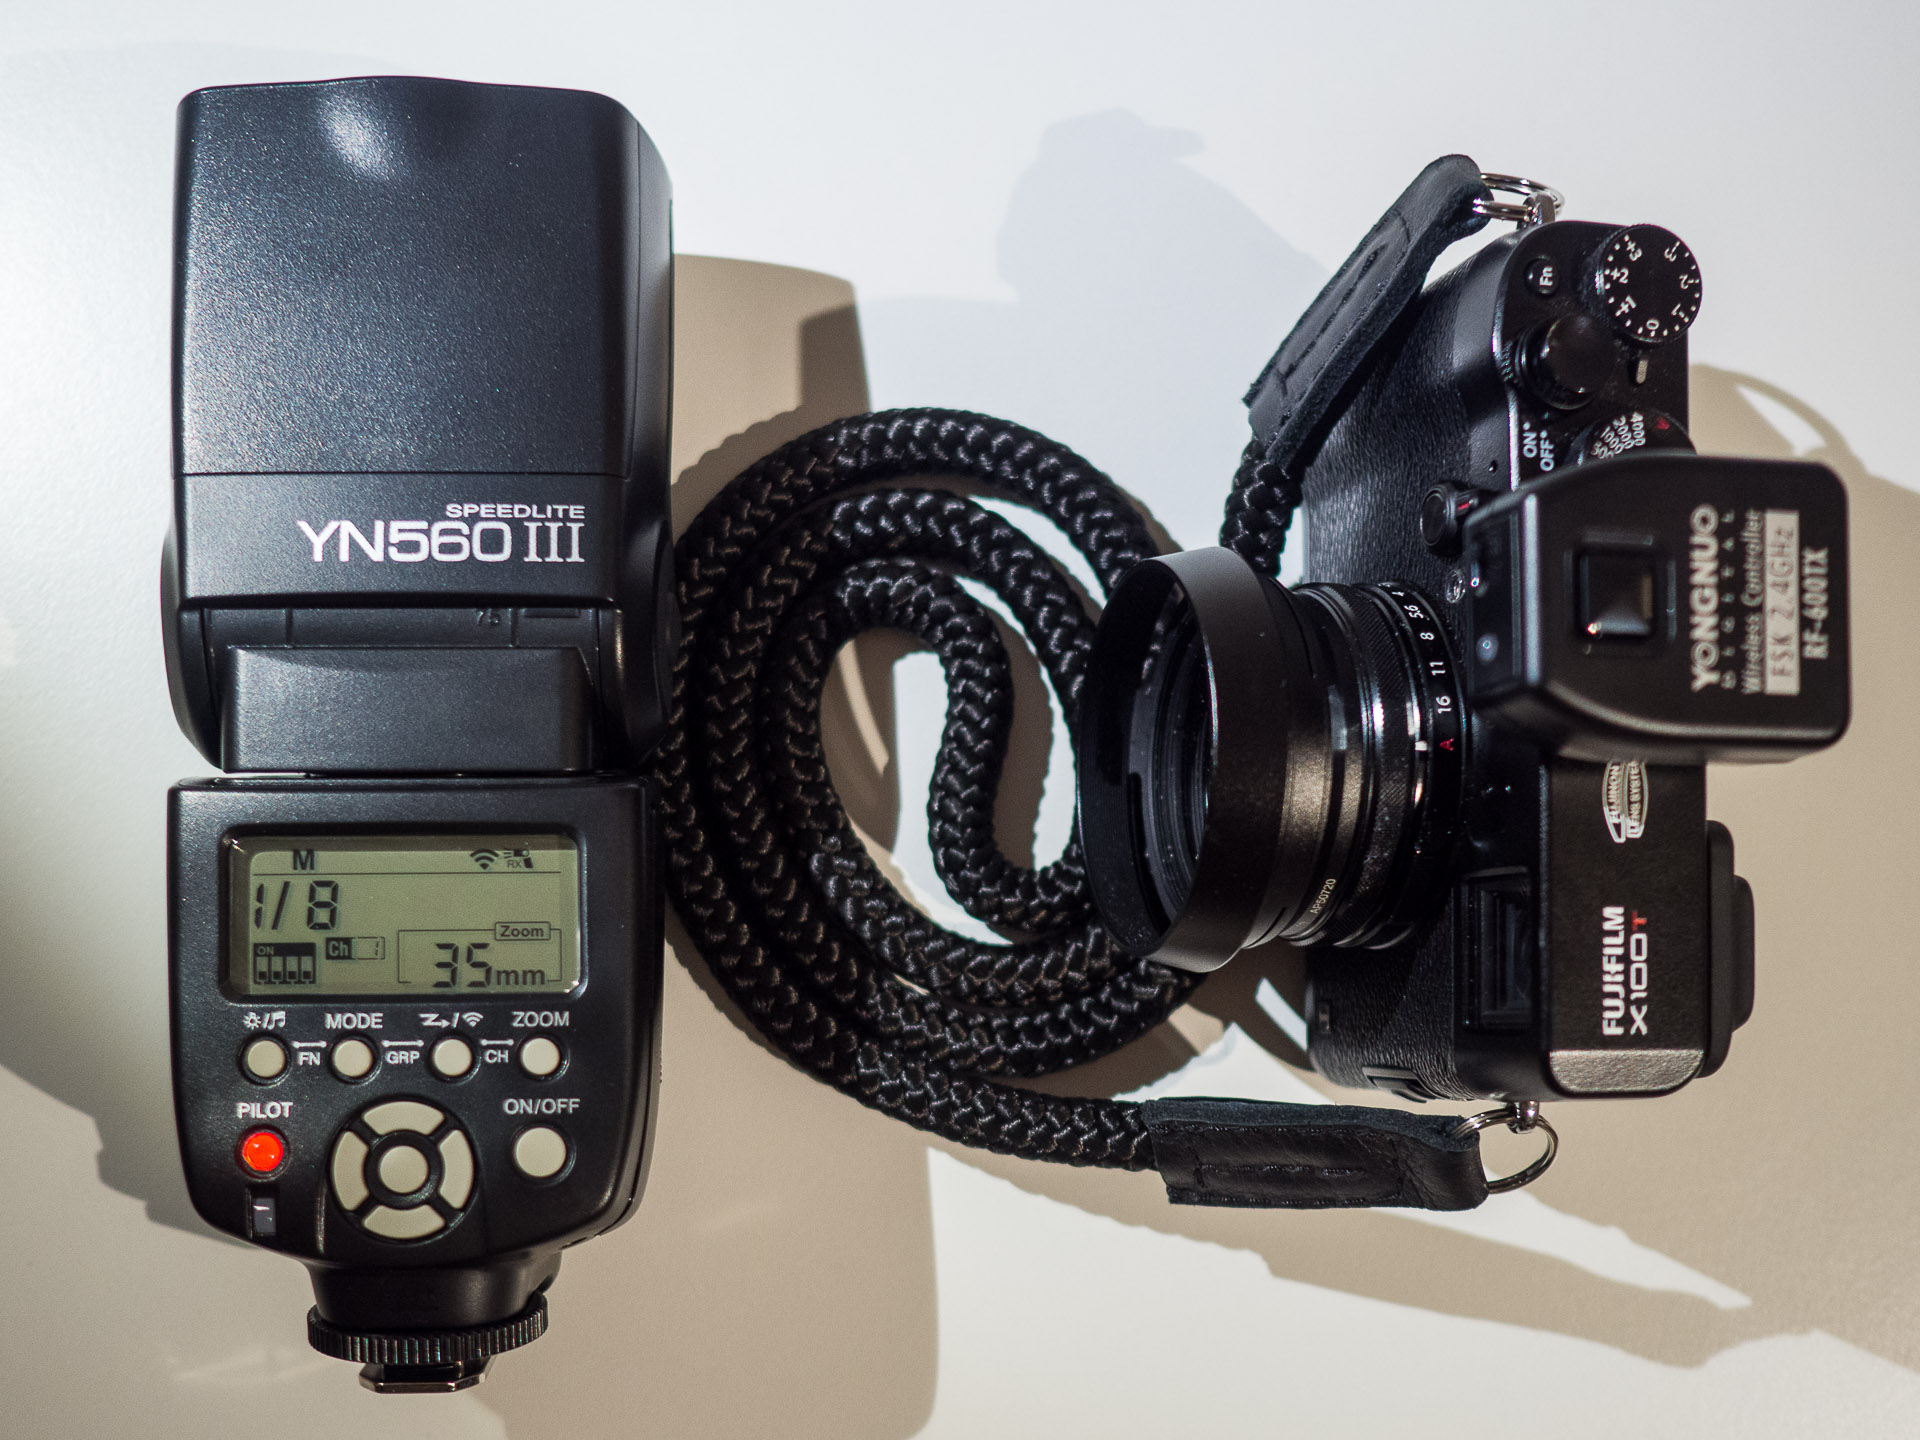
Most of the “branded” flashes, like Nikon, Canon and Sony, are rather expensive. However, most of the are TTL capable. If you’re looking for a cheaper alternative, I’d recommend the Yongnuo YN560-III Speedlite. It has a maximum guide number of 58. The major advantage of it is the fact that it has a 2.4GHz wireless receiver already built-in! You can find a chart of focal lengths and guide numbers here.
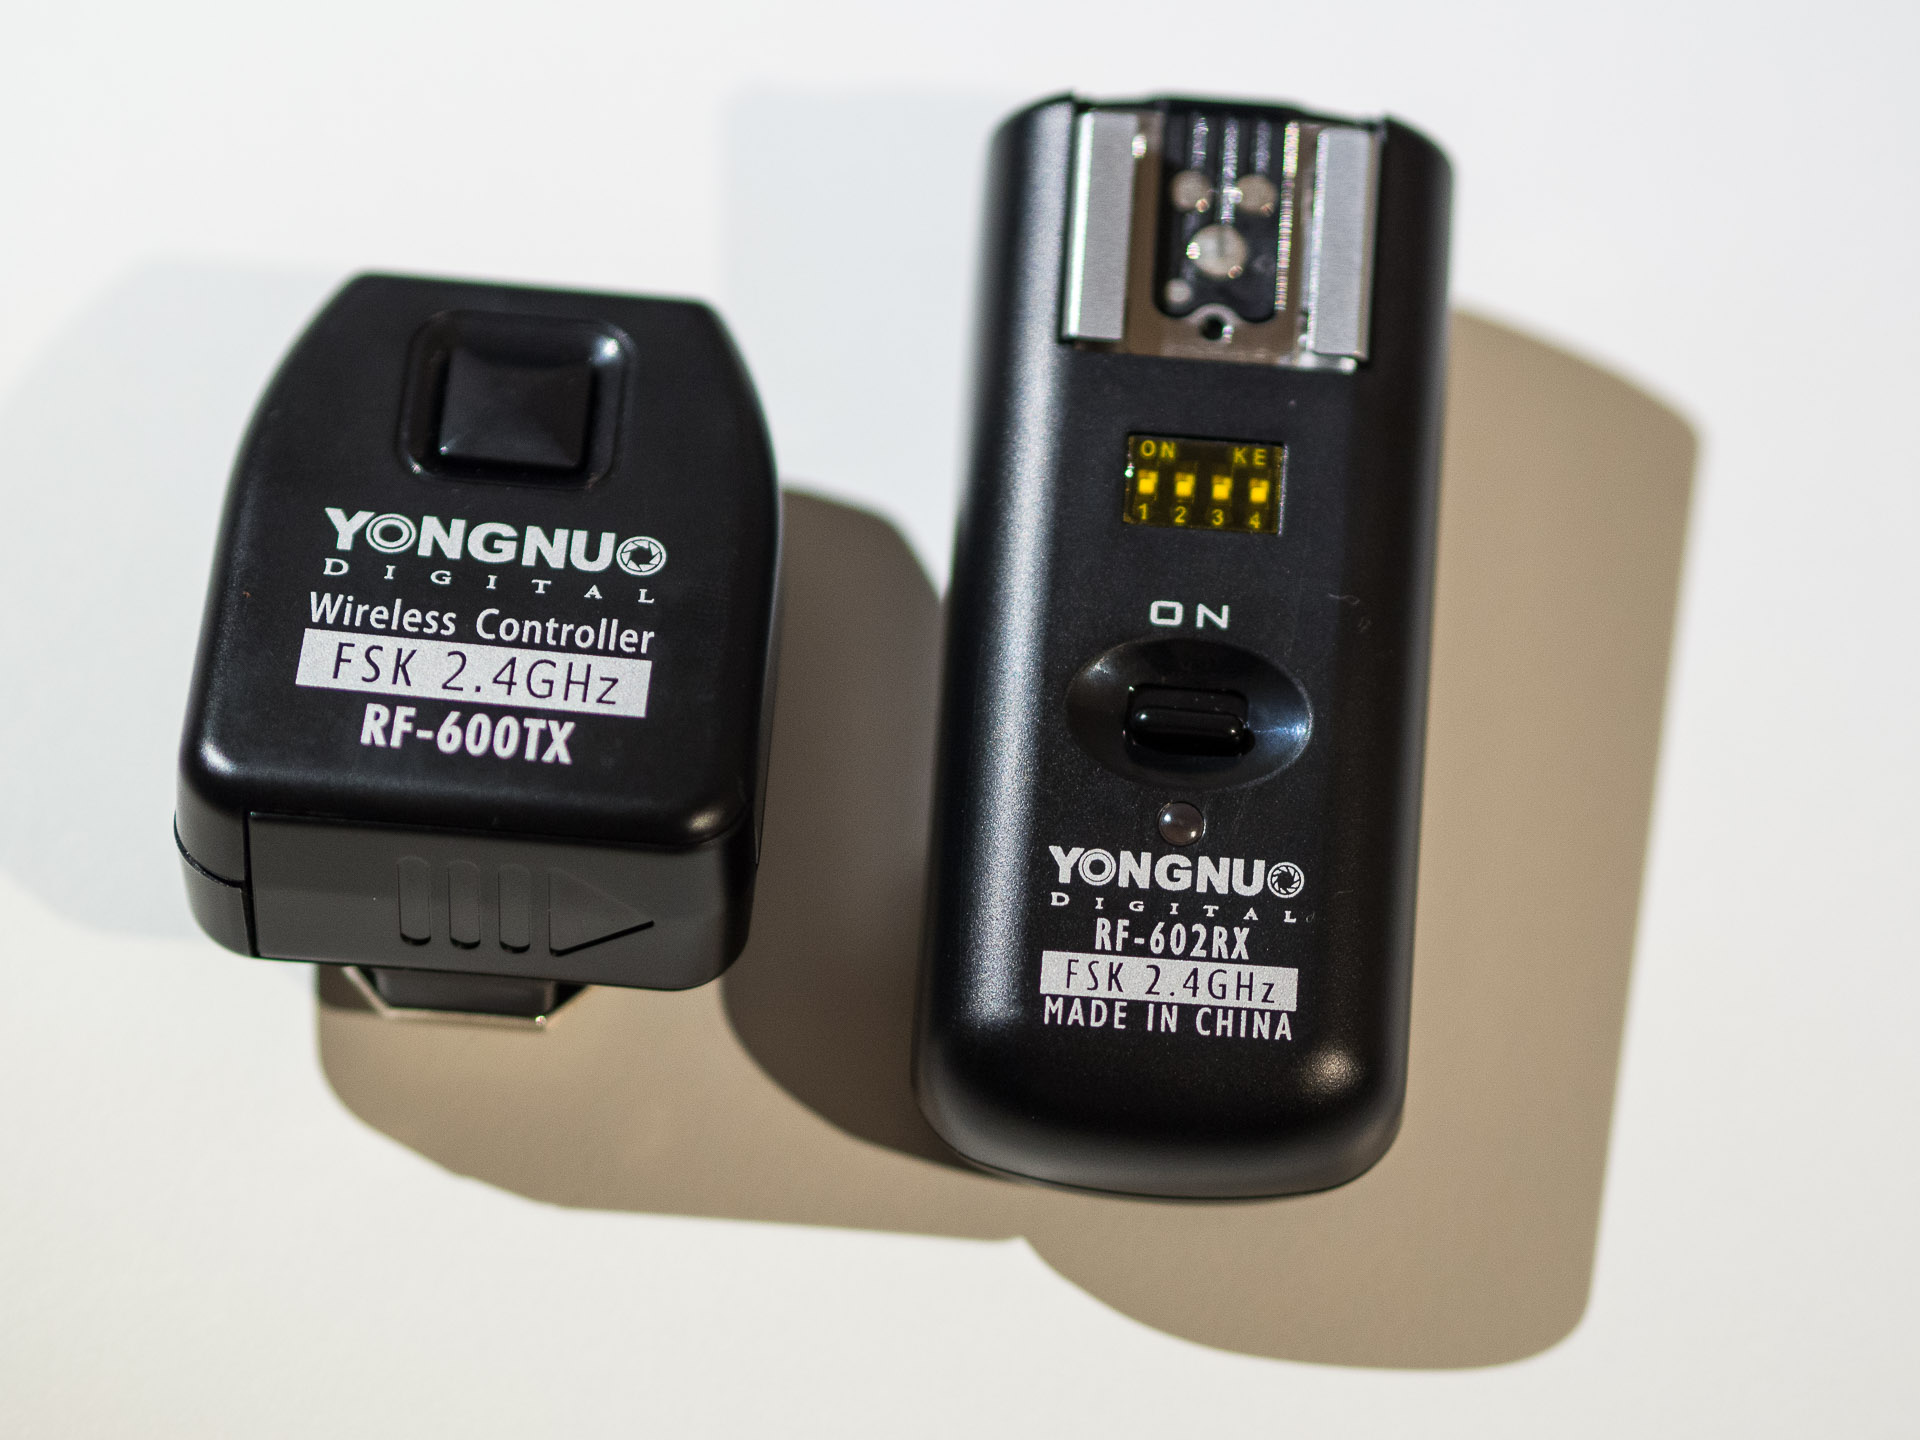
3) A Transmitter Or Cable
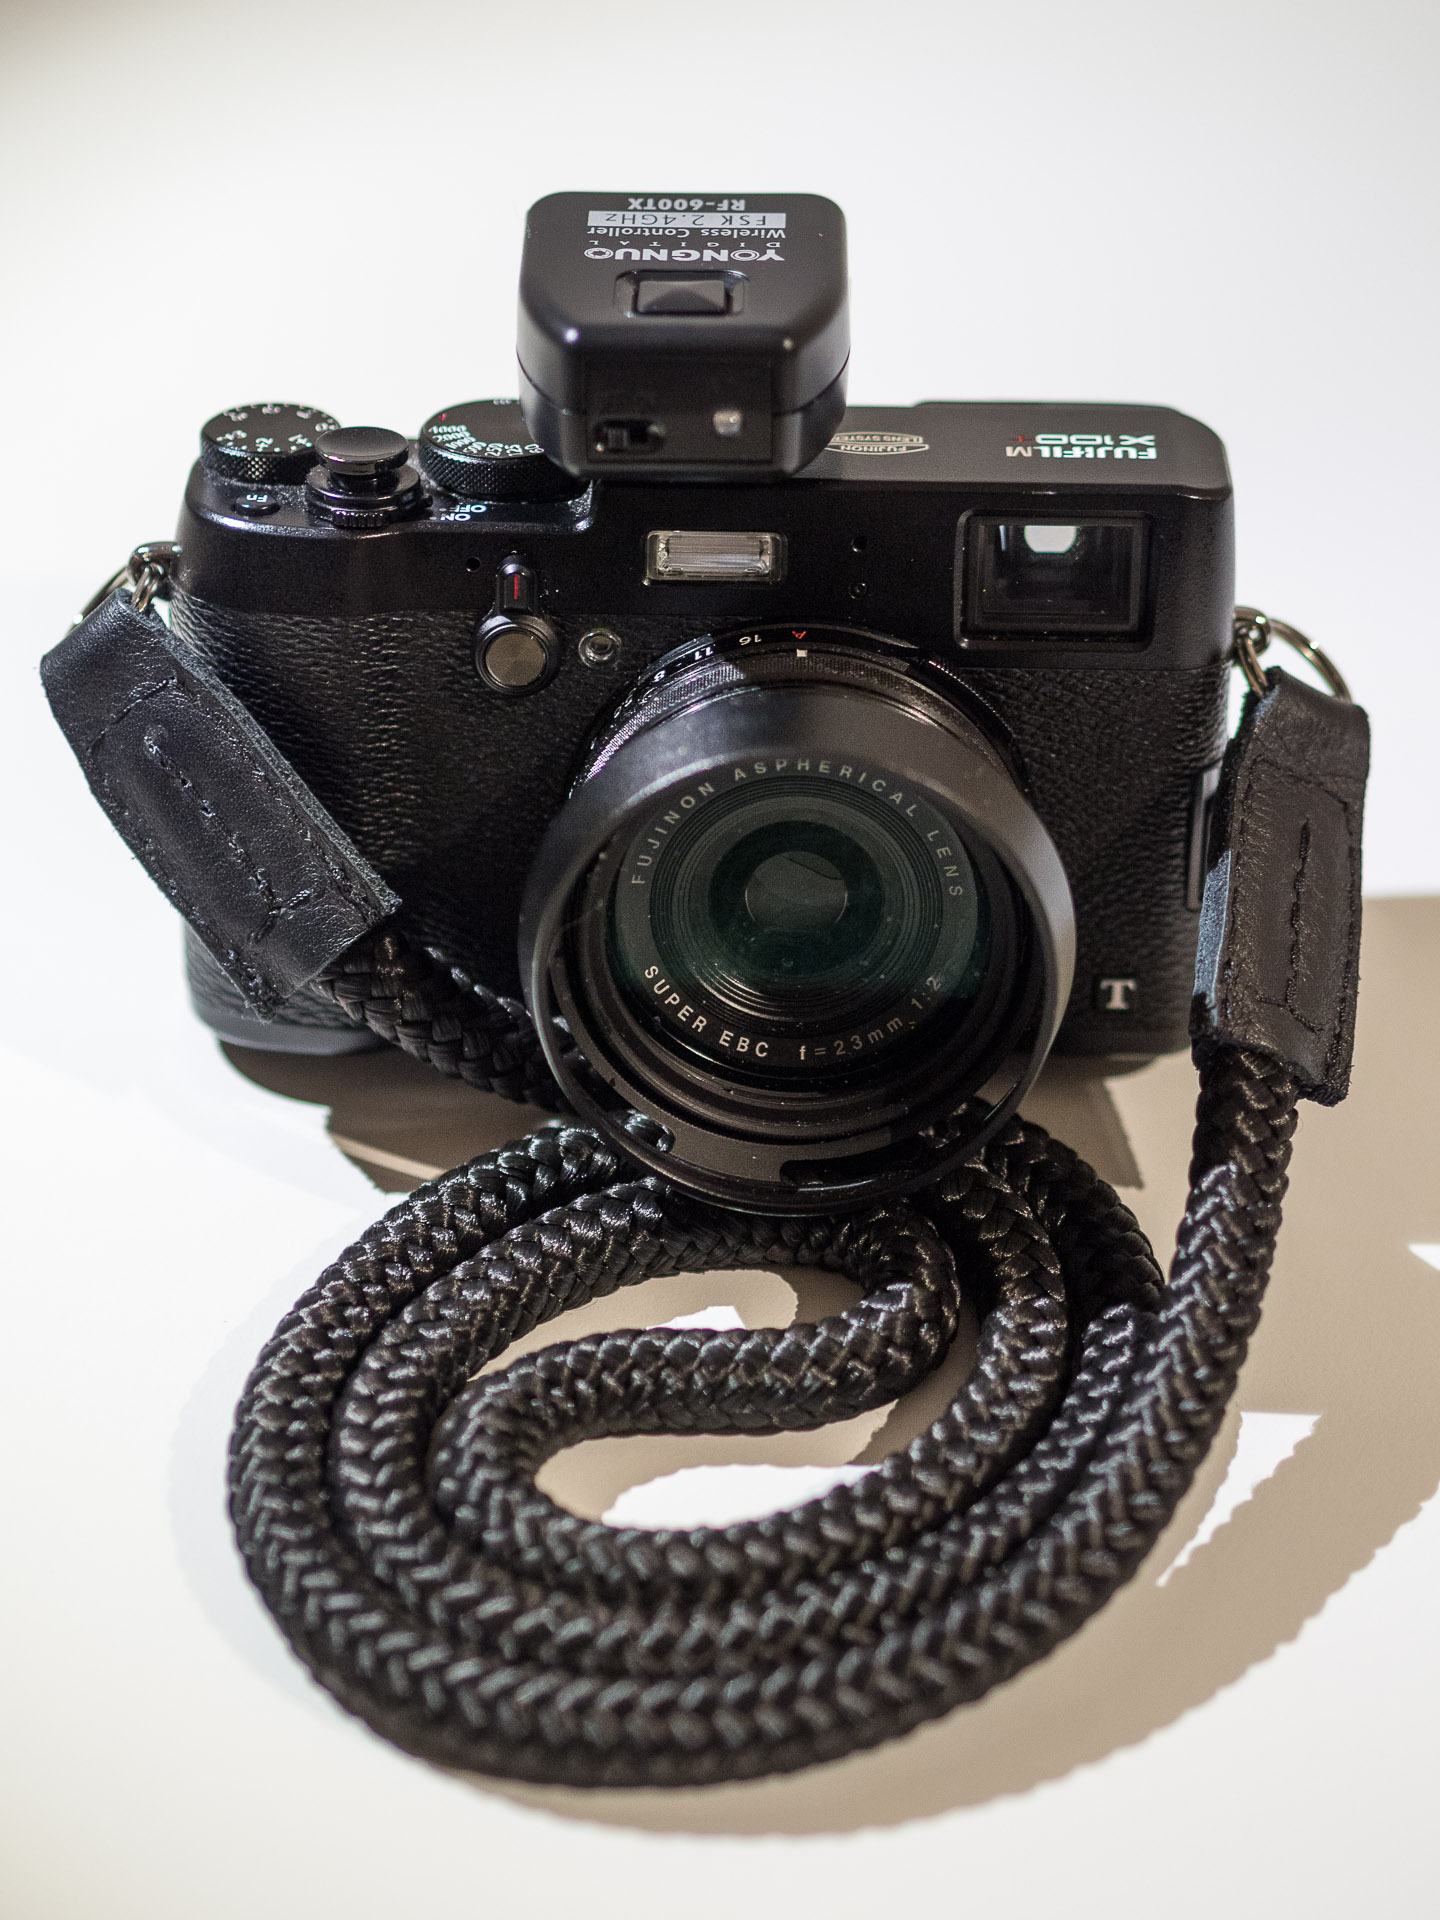
If you want to use the flash off-camera, you’ll need either a wireless transmitter or cable. Since the Yongnuo YN560-III Speedlite already has a receiver you’ll only need a transmitter. I can recommend the Yongnuo RF-602(C/N) or RF-603(C/N). Both are available for either Nikon or Canon. You’ll have to lookup, which one works best with your camera model.
If you own a TTL flash, you can buy a transmitter that also supports TTL, or you can use a TTL cable like this one.
Exposure Settings
You’ll need to set your camera to manual mode (M) when using flash in street photography. I recommend the following settings, which come from my personal experience:
- Aperture: f/11
- Shutter speed: 1/125s (highly depends on your flash sync speed!)
- ISO: 200
- Flash power: 1/8 or 1/4 (depending on the situation and surrounding light)
You should use these values as a starting point and make further adjustments that fit your situation.
Focus Settings
If you have an Olympus OM-D E-MXX camera, I’d recommend to use the autofocus as usual, because it works pretty fast, also in very low light situations. For all other mirrorless cameras, I strongly recommend to use zone focussing. When it’s dark, the autofocus of my X100T is too slow and I missed a lot of moments because of that. Due to an aperture of f/11 (see above), the depth of field will be large enough to give you tolerance in the actual distane to the subject. I usually set the distance to around 1m – 1.5m. My X100T has a nice blue indicator bar (see image below), visualizing the actual depth of field. If you want to crunch the numbers, you can use DoFmaster to calculate your settings exactly.

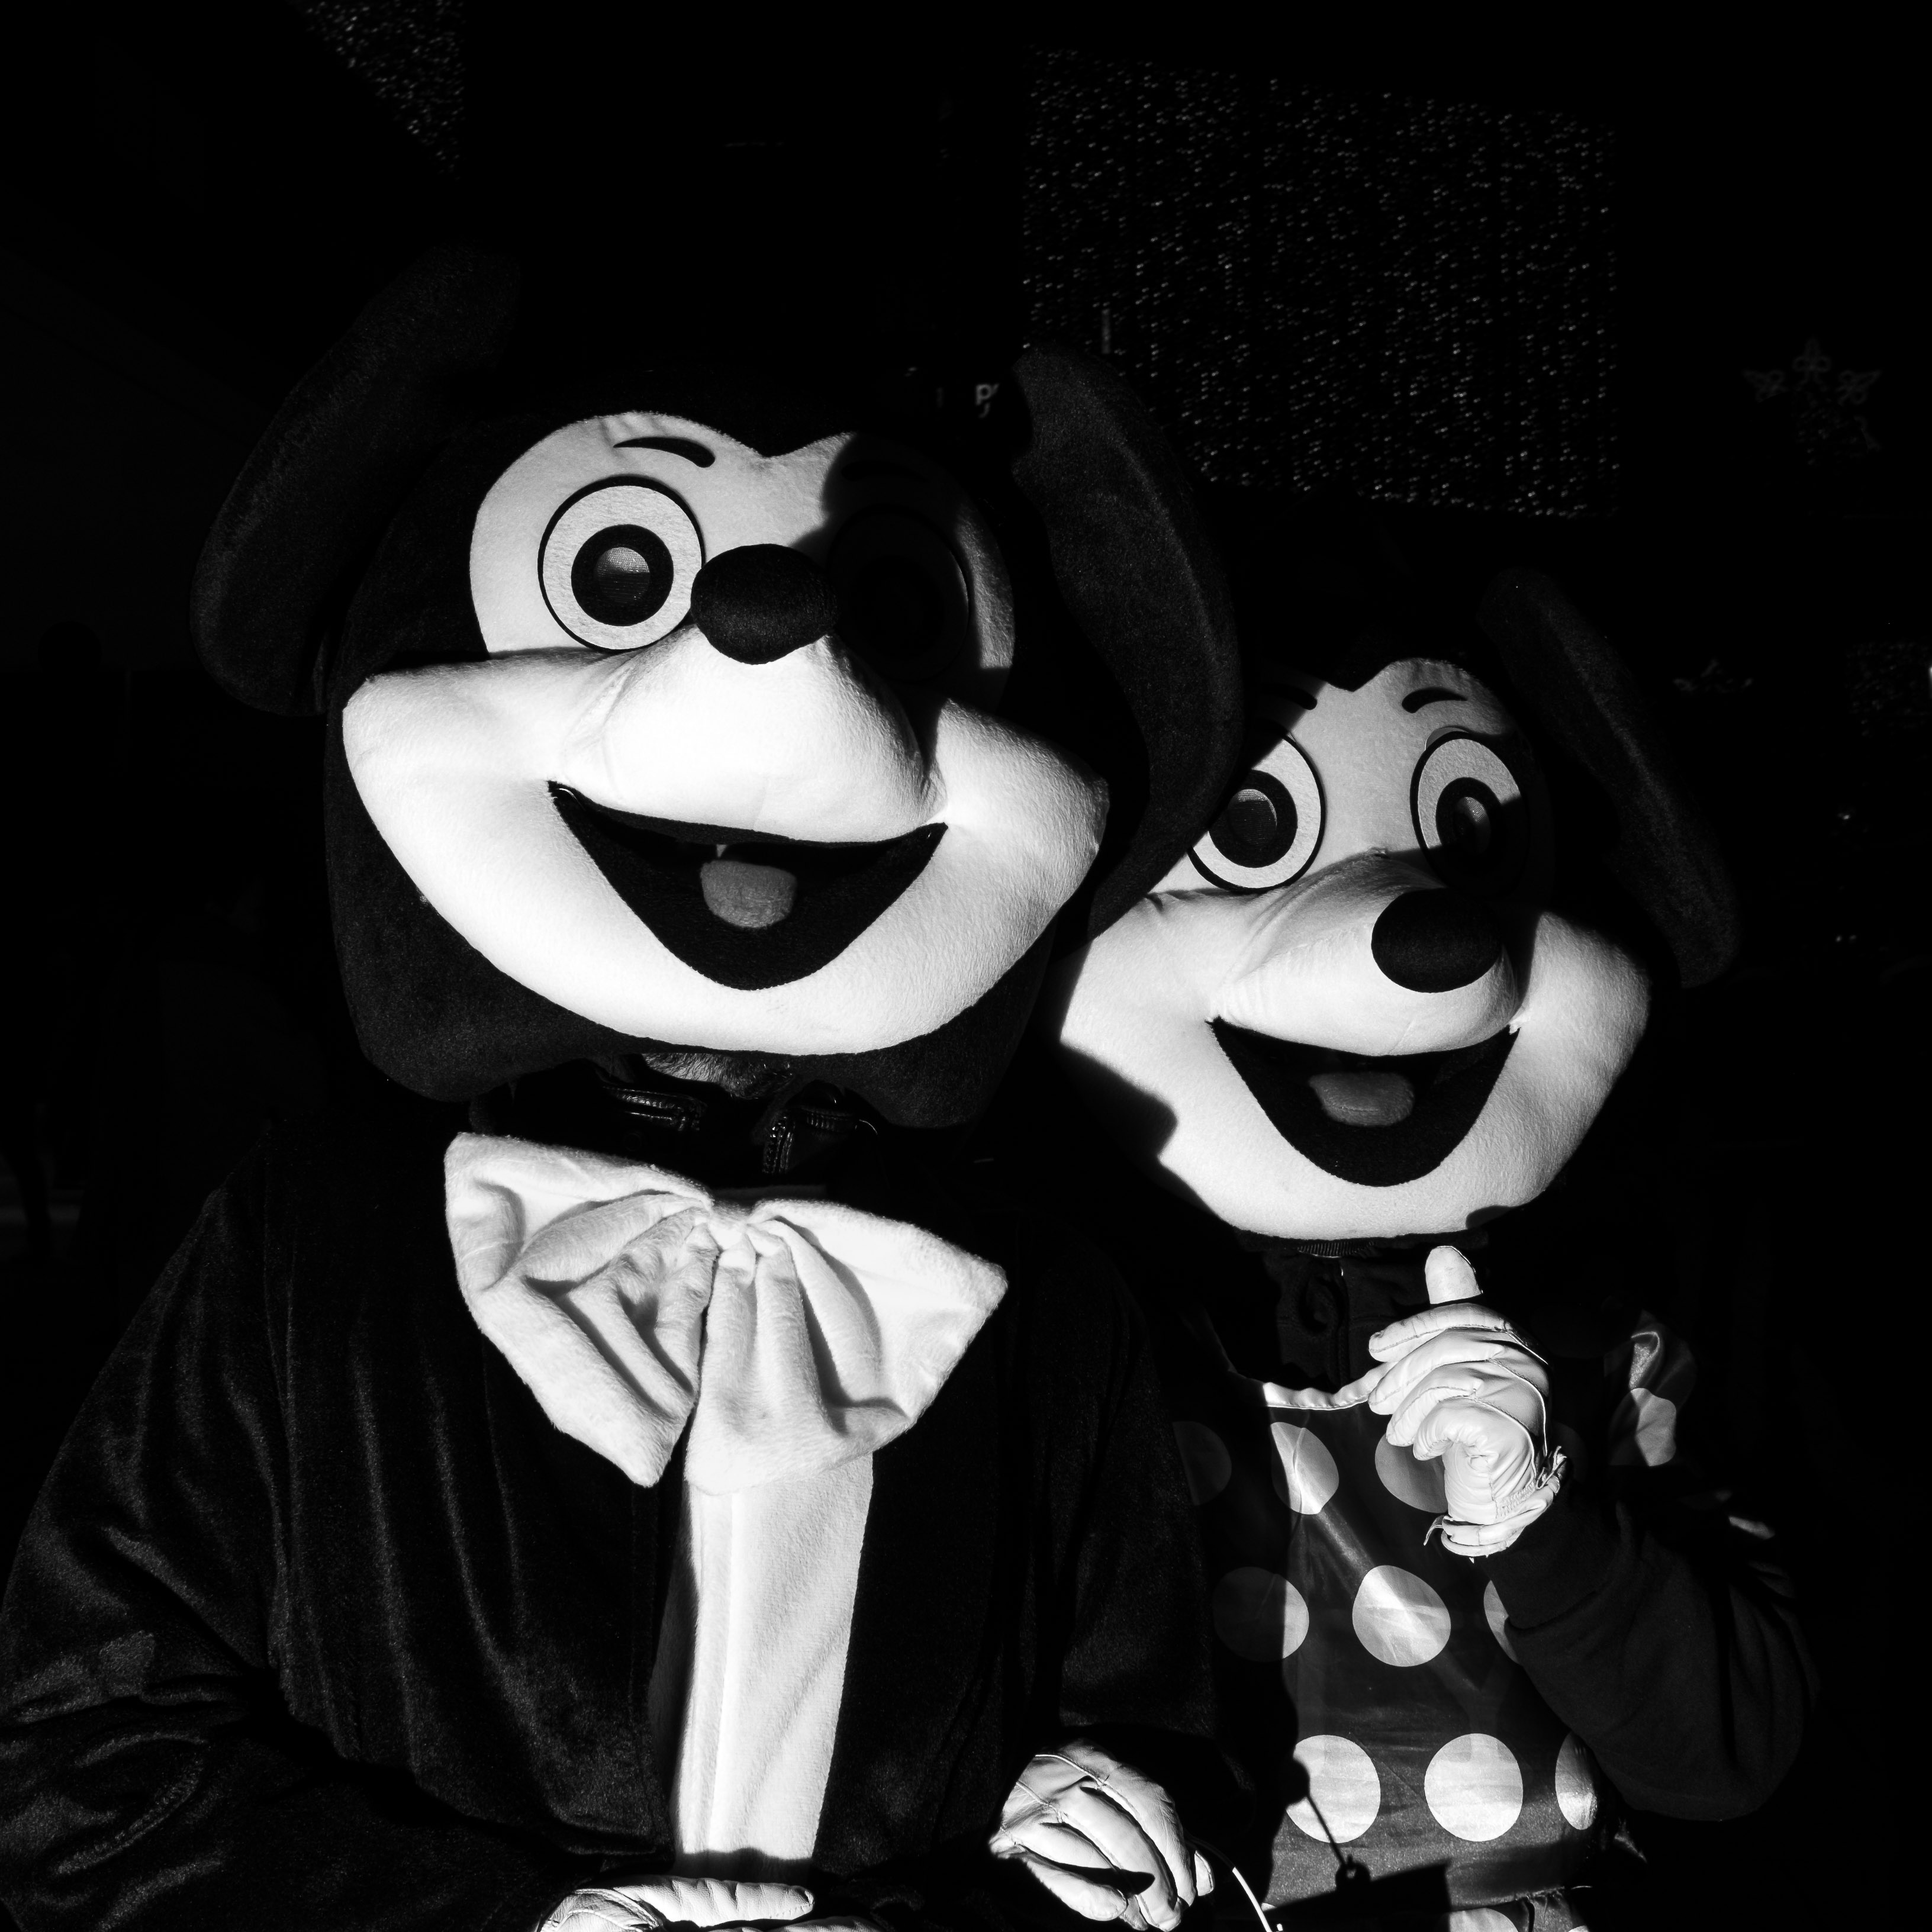
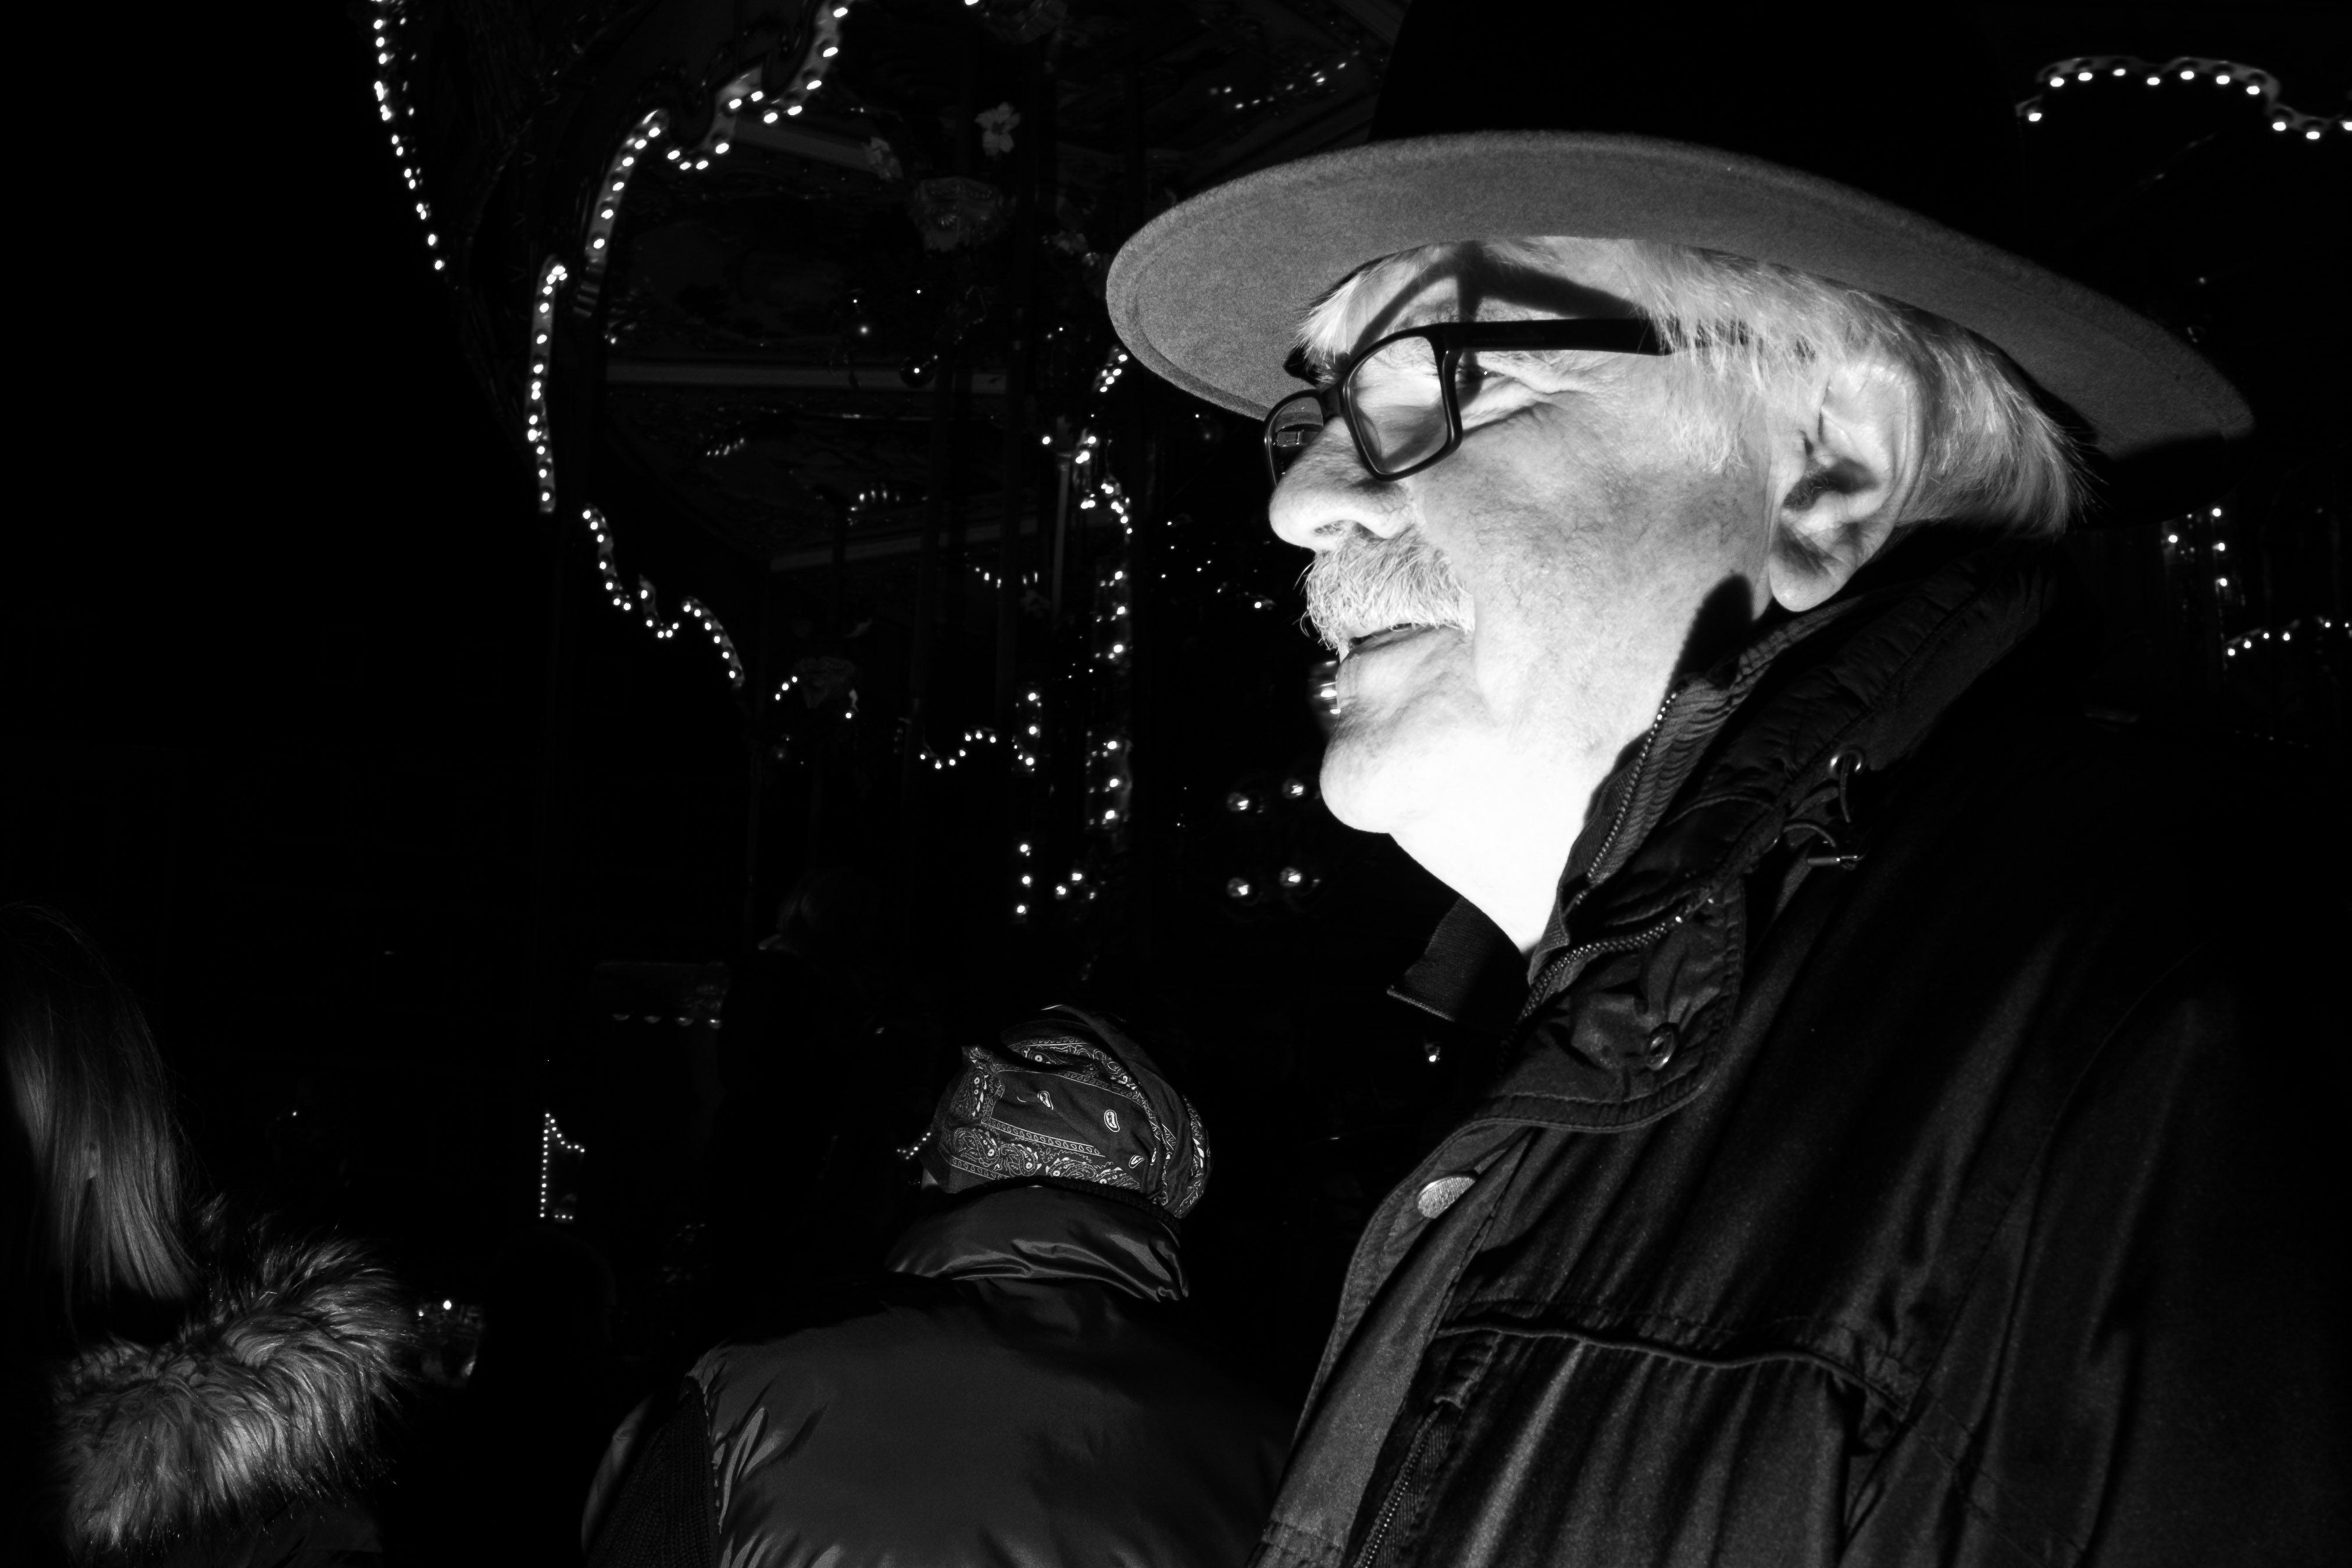
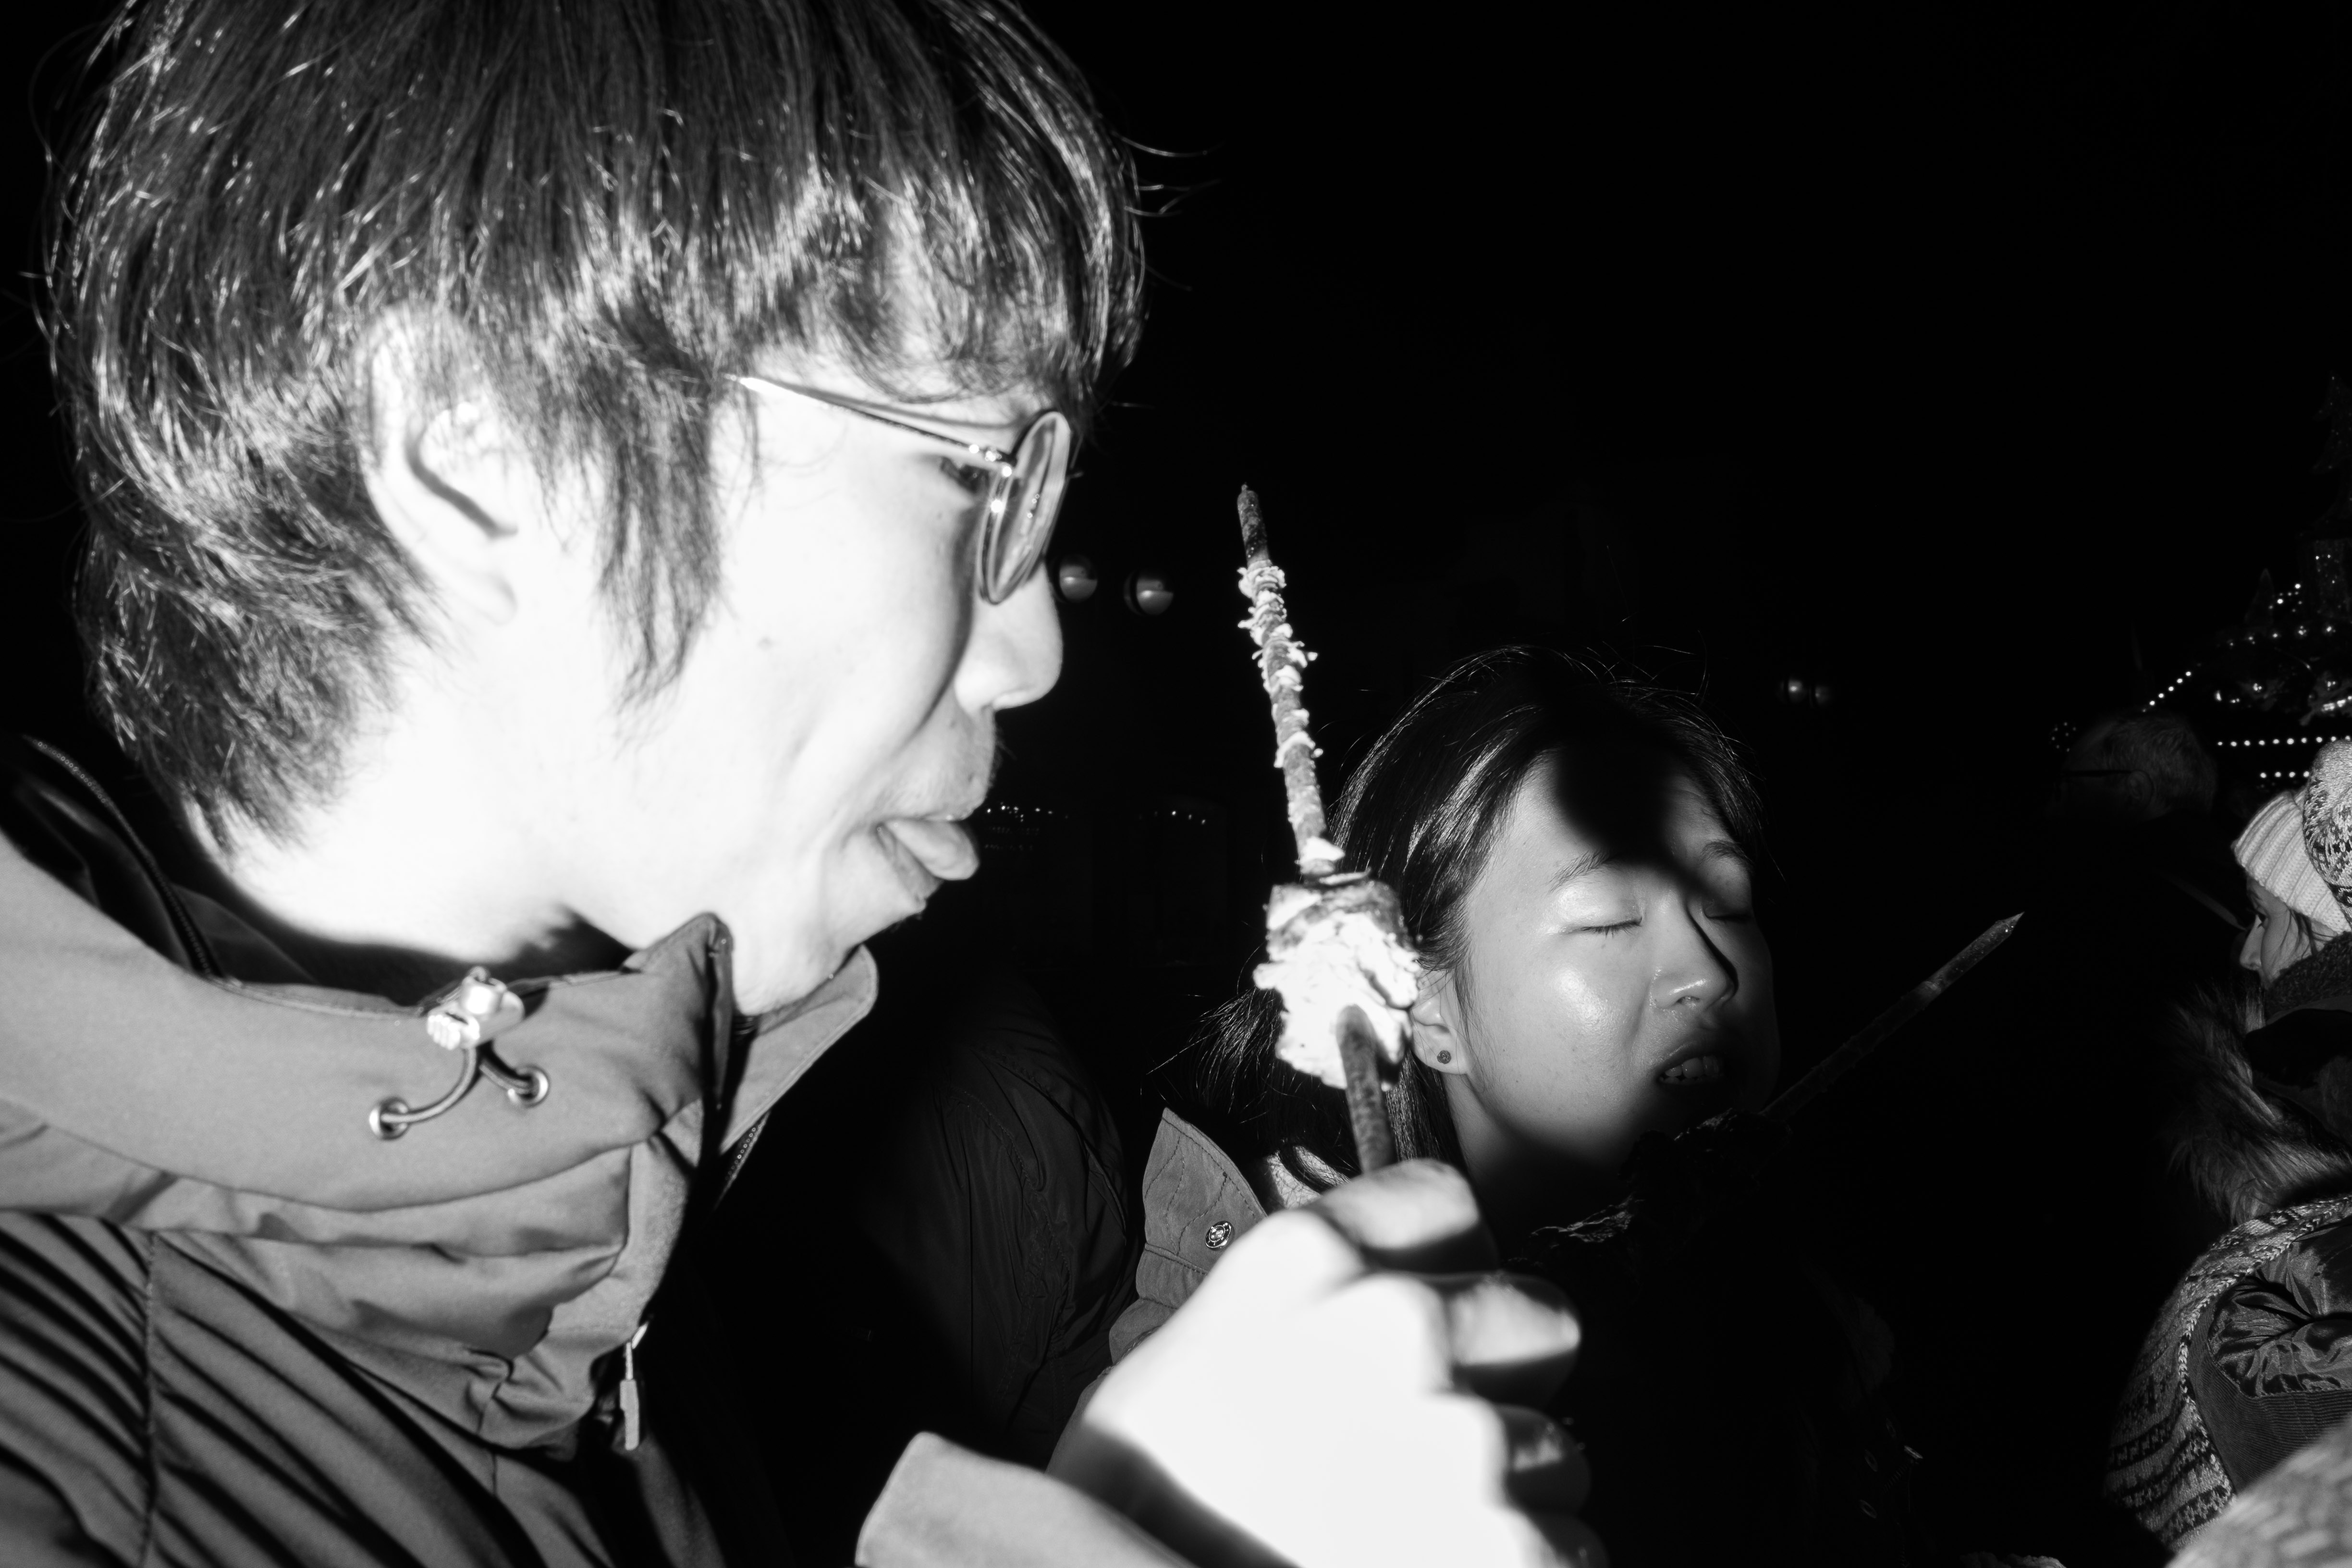
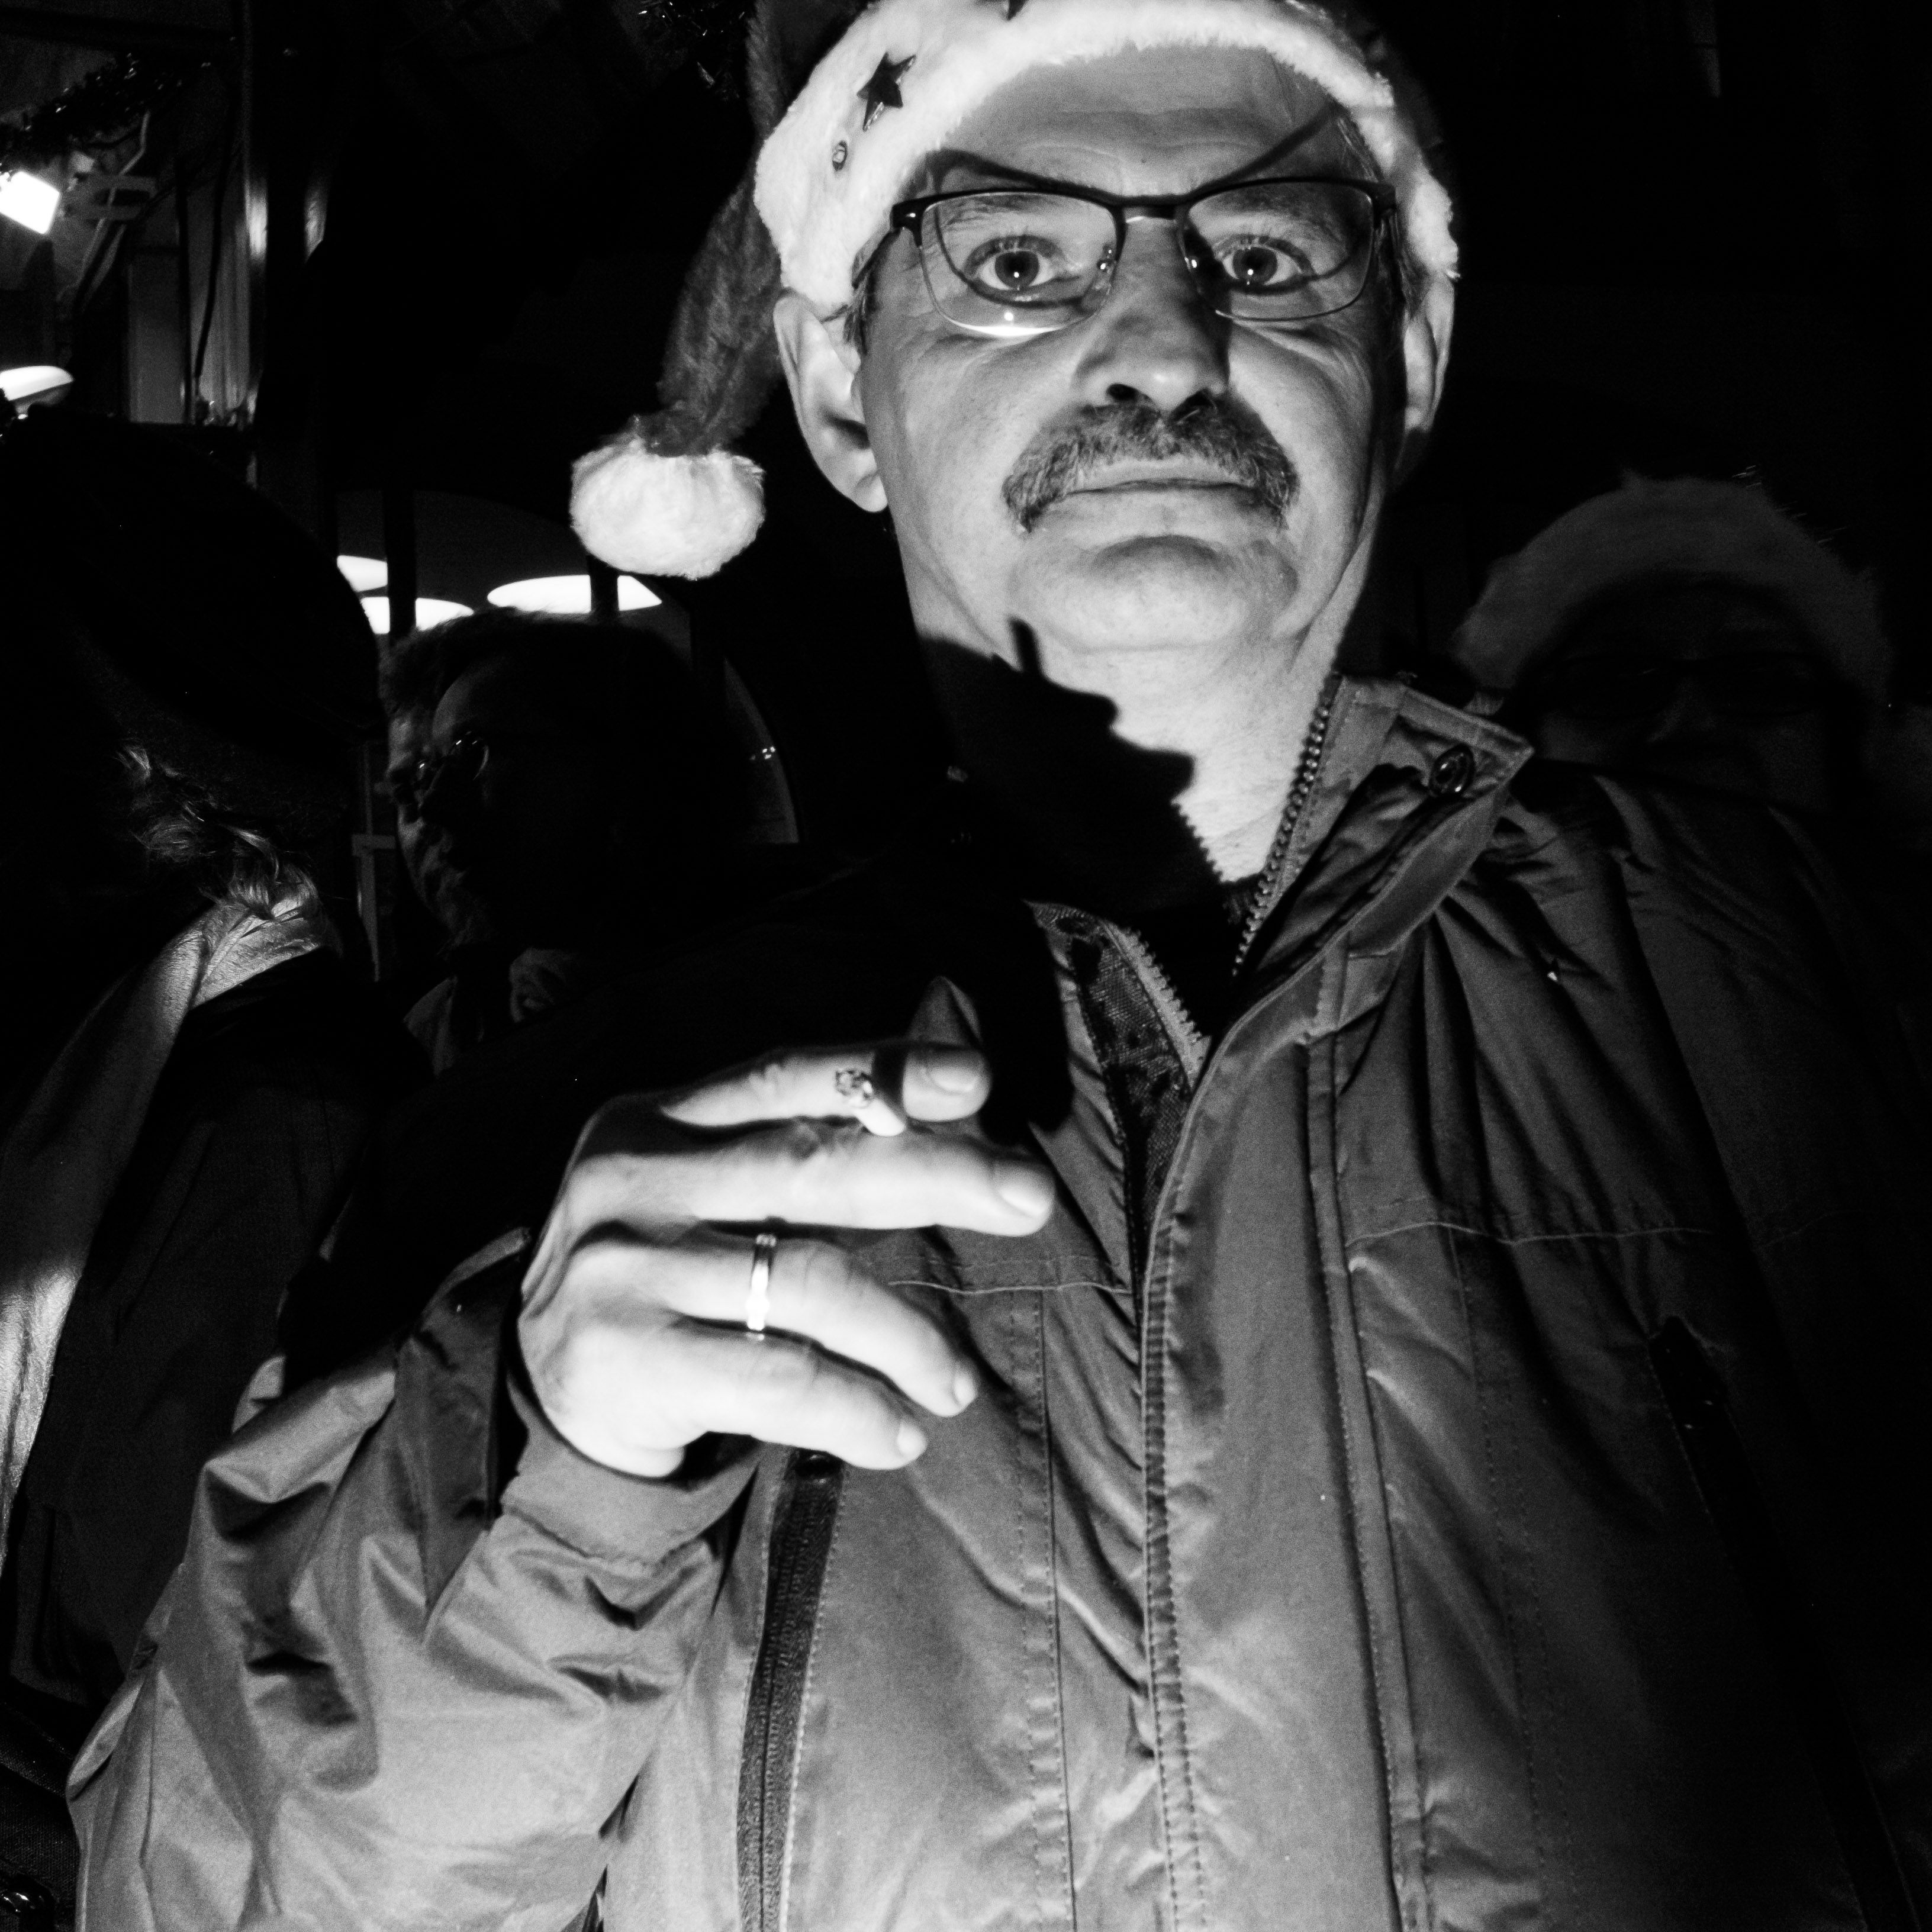
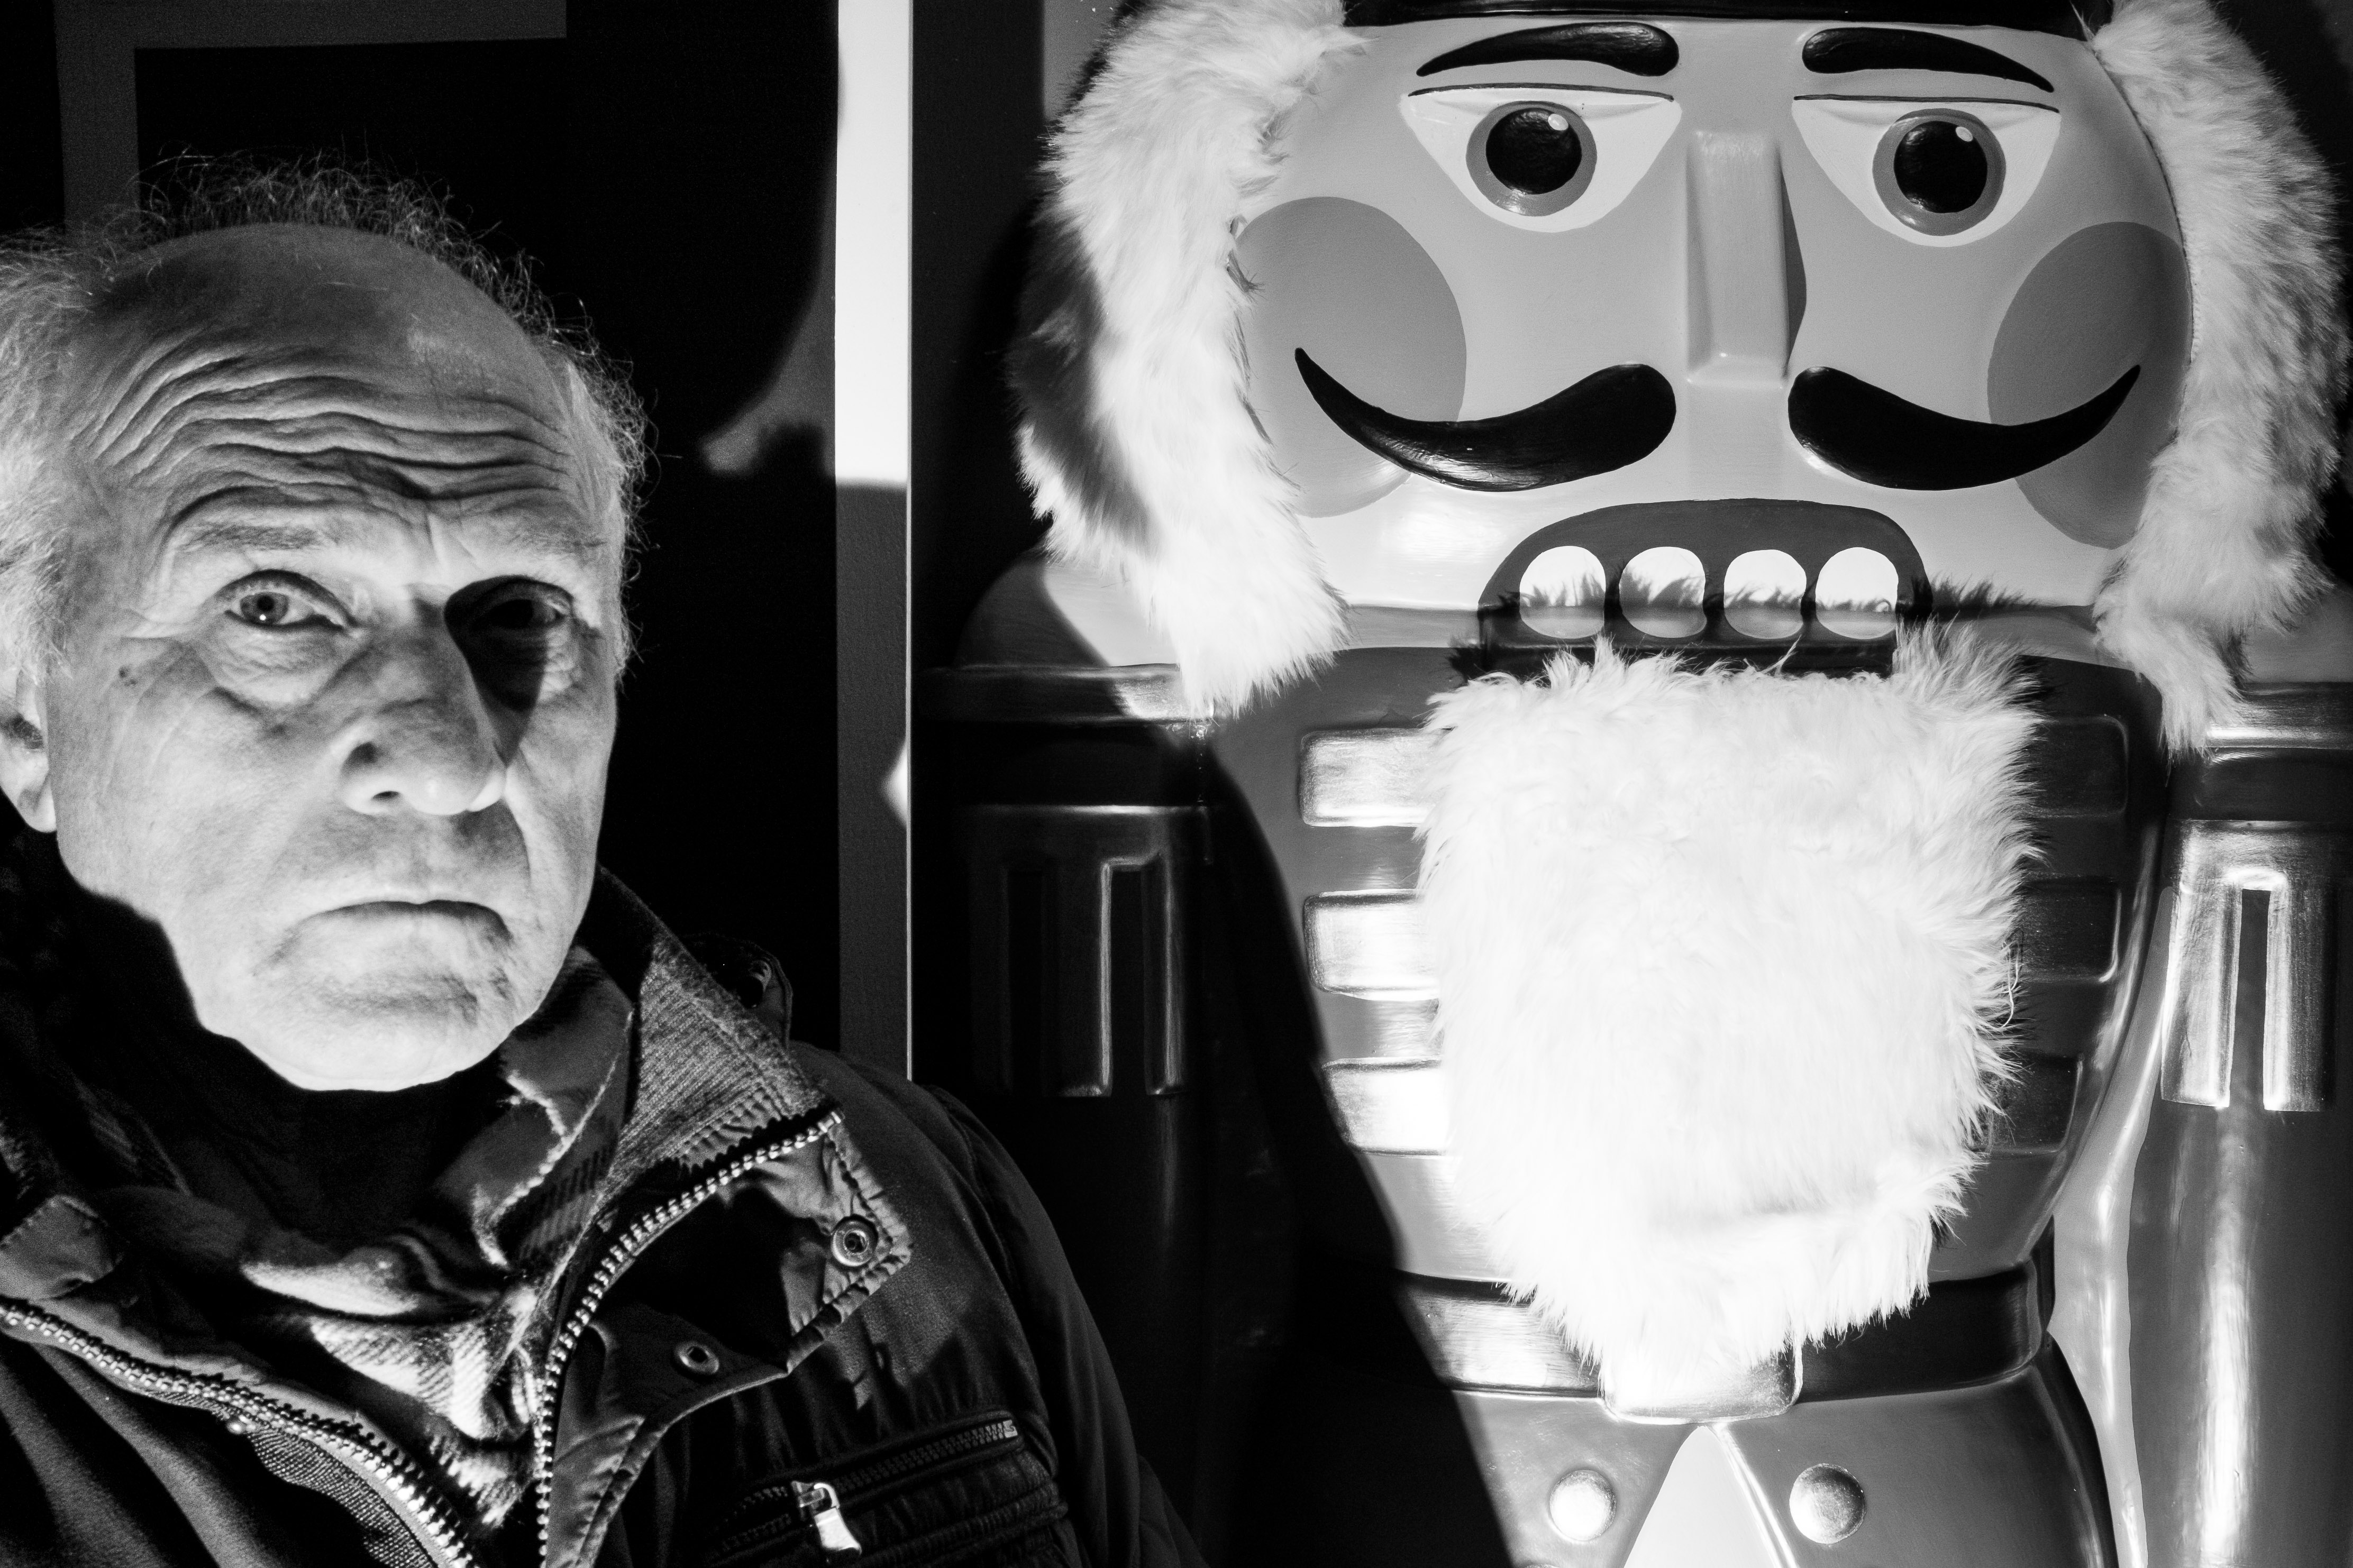
Examples


Notes On Using Flash With The Fuji X100T
The Fuji X100T behaves a little weird when it comes to flash settings. You might run into situation where the flash mode cannot be activated. Here’s a list of settings that the flash mode depends on:
- Silent mode needs to be turned off
- Mechanical shutter needs to be used rather that electronic shutter
- The camera needs to be in single shot mode rather than continuous shooting (drive button)